
Hikvision IDS-7204HUHI-M1/S
Hikvision IDS-7204HUHI-M1/S AcuSense 4-Channel H.265 DVR User Manual
Model: IDS-7204HUHI-M1/S
1. تعارف
This manual provides detailed instructions for the installation, operation, maintenance, and troubleshooting of your Hikvision IDS-7204HUHI-M1/S AcuSense 4-Channel H.265 DVR. Please read this manual thoroughly before using the product to ensure proper and safe operation.
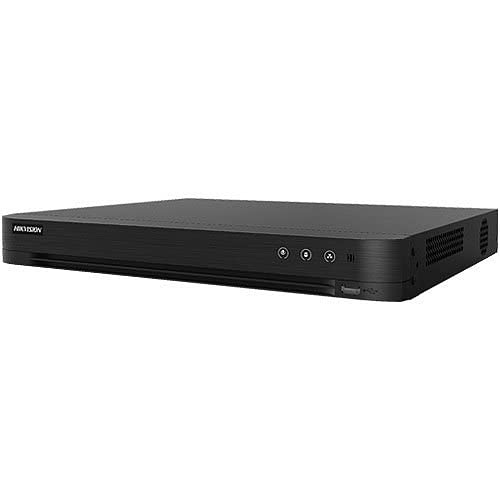
Figure 1: Hikvision IDS-7204HUHI-M1/S AcuSense 4-Channel H.265 DVR. This image shows the compact black DVR unit, highlighting its professional and discreet design suitable for various surveillance environments.
اهم خاصيتون:
- تمام اينالاگ چينلز لاءِ ڊيپ لرننگ بيسڊ موشن ڊيڪشن 2.0
- گہرے سکيا جي بنياد تي پردي جي حفاظت
- H.265 Pro+/H.265 Pro/H.265/H.264+/H.264 وڊيو ڪمپريشن
- HDTVI/AHD/CVI/CVBS/IP وڊيو ان پٽ
- coaxial ڪيبل ذريعي آڊيو
- 8/16-ch IP ڪئميرا ان پٽ تائين (8 MP تائين)
- 10 ٽي بي جي گنجائش في HDD تائين
2. سيٽ اپ
2.1. جسماني رابطا
Before powering on your DVR, ensure all necessary connections are made securely.
- پاور ڪنيڪشن: Connect the provided power adapter to the DVR's 12V DC power input and then to a power outlet.
- ڪنيڪشن مانيٽر: HDMI يا VGA ڪيبل استعمال ڪندي مانيٽر کي DVR سان ڳنڍيو.
- Mouse Connection: Plug the USB mouse into one of the USB ports on the DVR.
- نيٽ ورڪ ڪنيڪشن: Connect the DVR to your network router using an Ethernet cable for remote access and IP camera integration.
- ڪئميرا ڪنيڪشن: Connect your analog cameras to the BNC video input ports. For IP cameras, ensure they are powered and connected to the same network as the DVR.
2.2. شروعاتي ترتيب
Upon first power-up, the DVR will guide you through an initial setup wizard. You will typically set up a login password or pattern, configure date/time, and network settings.
2.3. Integrating IP Cameras and Switching Analog Channels
Your DVR supports both analog and IP camera inputs. Analog channels can be switched to IP channels to expand your system's capabilities.
Video 1: How to Change Analog Channels to IP Ones for ANNKE 8CH DVR. This video demonstrates the process of converting analog channels to IP channels on a DVR, allowing for greater flexibility in camera setup. The steps shown are generally applicable to various DVR models, including Hikvision.
Video 2: How to Hook Up An IP Cam to ANNKE DVR System. This video illustrates the procedure for connecting an IP camera to a DVR system, covering the necessary network configurations. The principles apply broadly to DVR systems like the Hikvision model.
3. آپريٽنگ هدايتون
3.1. لائيو View and Window Division
ڪامياب سيٽ اپ کان پوءِ، توهان ڪري سگهو ٿا view live feeds from your connected cameras. The DVR allows for various screen layouts to monitor multiple cameras simultaneously.
Video 3: How to Switch Window Division to Preview for ANNKE 8CH DVR. This video demonstrates how to change the live view layout on a DVR, allowing users to select different window divisions (e.g., 1x1, 2x2, 1+7) to monitor multiple camera feeds effectively.
3.2. Recording Configuration
The DVR offers flexible recording options, including continuous recording and event-triggered recording. You can customize recording schedules for each camera.
Video 4: How to Set Recording Plan for ANNKE 8CH DVR. This video guides users through setting up a recording schedule on a DVR, including continuous and event-based recording options for different days and times.
4. سار سنڀال
4.1. عام سار سنڀال
- Regularly check all cable connections for security.
- گرميءَ کان بچڻ لاءِ DVR کي سٺي هوادار جاءِ تي رکو.
- Ensure the DVR's firmware is up to date for optimal performance and security.
- Periodically back up important recordings to external storage.
4.2. Resetting the DVR
In some cases, such as forgetting a password or encountering software issues, a reset may be necessary. This can often be done via the system's interface or a physical reset button.
Video 5: How to reset Reolink NVR. This video demonstrates how to reset an NVR, including locating and pressing a physical reset button. While the video features a Reolink NVR, the general concept of a physical reset button and its function may apply to other DVR/NVR systems, though the exact location and procedure might vary for your Hikvision DVR.
5. مسئلا حل ڪرڻ
- ڪابه وڊيو آئوٽ: Check power connections, monitor cable, and ensure the correct input source is selected on the monitor. Verify camera connections and power.
- Cannot Access DVR Remotely: Ensure the DVR is connected to the network, network settings are correct (IP address, gateway, DNS), and port forwarding is configured on your router if necessary.
- رڪارڊنگ جا مسئلا: Check HDD status in system settings. Ensure recording schedules are correctly configured. Verify camera functionality.
- وساريو پاسورڊ: Refer to the reset instructions in the Maintenance section or consult Hikvision's official support for password recovery options.
6. وضاحتون
| خاصيت | تفصيل |
|---|---|
| پراڊڪٽ ماڊل | IDS-7204HUHI-M1/S |
| وڊيو ڪمپريشن | H.265 Pro+/H.265 Pro/H.265/H.264+/H.264 |
| وڊيو انپٽس | ايڇ ڊي ٽي وي آءِ/ايڇ ڊي/سي وي آءِ/سي وي بي ايس/آءِ پي |
| IP Camera Inputs | Up to 8/16-ch (up to 8 MP) |
| آڊيو ان پٽ | Audio via coaxial cable, 1 RCA port |
| HDD ظرفيت | 1 TB (Up to 10 TB capacity per HDD) |
| وڌ ۾ وڌ فريم جي شرح | 30 fps |
| وڌ ۾ وڌ ريڪارڊ | 8MP |
| رابطي | ايٿرنيٽ |
| پيداوار جي ماپ | 24.1L x 31.5W x 4.6H Centimetres (9.5" x 12.4" x 1.8") |
| DVR وزن | 1.16 ڪلوگرام (2.56 پائونڊ) |
7. وارنٽي ڄاڻ
For warranty details, please refer to the official Hikvision warranty policy provided with your product packaging or visit the official Hikvision webسائيٽ. وارنٽي دعوائن لاءِ خريداري جو ثبوت رکو.
8. ٽيڪنيڪل سپورٽ
If you encounter any issues not covered in this manual, please contact Hikvision technical support through their official webسائيٽ يا توهان جي پراڊڪٽ دستاويزن ۾ ڏنل رابطي جي معلومات. سپورٽ سان رابطو ڪرڻ وقت پڪ ڪريو ته توهان وٽ پنهنجو پراڊڪٽ ماڊل ۽ سيريل نمبر تيار آهي.
Ask a question about this manual
Ask about setup, troubleshooting, compatibility, parts, safety, or missing instructions. Manuals+ will review the question and use this page’s manual context to help answer it.