1. تعارف
This manual provides detailed instructions for the installation, operation, and maintenance of your FRONTECH H81 Chipset Motherboard (Model: H81/1150 SOCKET DDR3, FT-0471). This motherboard is designed to support 4th Generation Intel (Haswell) processors with an LGA1150 socket. It features 2 DDR3 RAM slots, multiple USB 3.0 and 2.0 ports, SATA slots, and an NVMe slot, providing a solid foundation for personal computer builds. Please read this manual thoroughly before proceeding with installation.
2. حفاظت جي ڄاڻ
Observe the following safety precautions to prevent damage to the motherboard and injury to yourself:
- ڪنهن به جزو کي انسٽال ڪرڻ يا هٽائڻ کان اڳ هميشه وال آئوٽليٽ مان بجلي جي فراهمي کي ڊسڪنيڪٽ ڪريو.
- Handle the motherboard by its edges to avoid touching sensitive components and to prevent electrostatic discharge (ESD) damage.
- It is recommended to wear an anti-static wrist strap when working inside the computer chassis.
- ڪمپيوٽر جي ڪيس اندر مناسب وينٽيليشن کي يقيني بڻايو وڃي ته جيئن گرميءَ کان بچي سگهجي.
- مدر بورڊ کي نمي ۽ انتهائي گرمي پد کان پري رکو.
3. پيڪيج مواد
پڪ ڪريو ته سڀئي شيون توهان جي مدر بورڊ پيڪيج ۾ موجود آهن:
- FRONTECH H81 Chipset Motherboard (FT-0471)
- SATA ڊيٽا ڪيبل
- I/O Shield/Bracket
- استعمال ڪندڙ جو دستياب (ھي دستاويز)

Image: FRONTECH H81 Motherboard, packaging, SATA cable, and I/O shield.
4. سيٽ اپ ۽ تنصيب
Follow these steps for proper installation of the motherboard and its components.
4.1. پروسيسر (سي پي يو) جي انسٽاليشن
- مدر بورڊ تي LGA1150 CPU ساکٽ ڳوليو.
- Gently push down the load lever and pull it sideways to open the socket retention frame.
- Carefully align the CPU with the socket, ensuring the golden triangle on the CPU matches the triangle mark on the socket. Do not force the CPU into the socket.
- برقرار رکڻ واري فريم کي بند ڪريو ۽ لوڊ ليور کي ان جي بند ٿيل پوزيشن ۾ واپس ڌڪيو.
- سي پي يو ڪولر کي ان جي ٺاهيندڙ جي هدايتن مطابق انسٽال ڪريو.
تصوير: ويجهو تصوير view of the LGA1150 CPU socket on the motherboard.
4.2. ميموري (RAM) جي انسٽاليشن
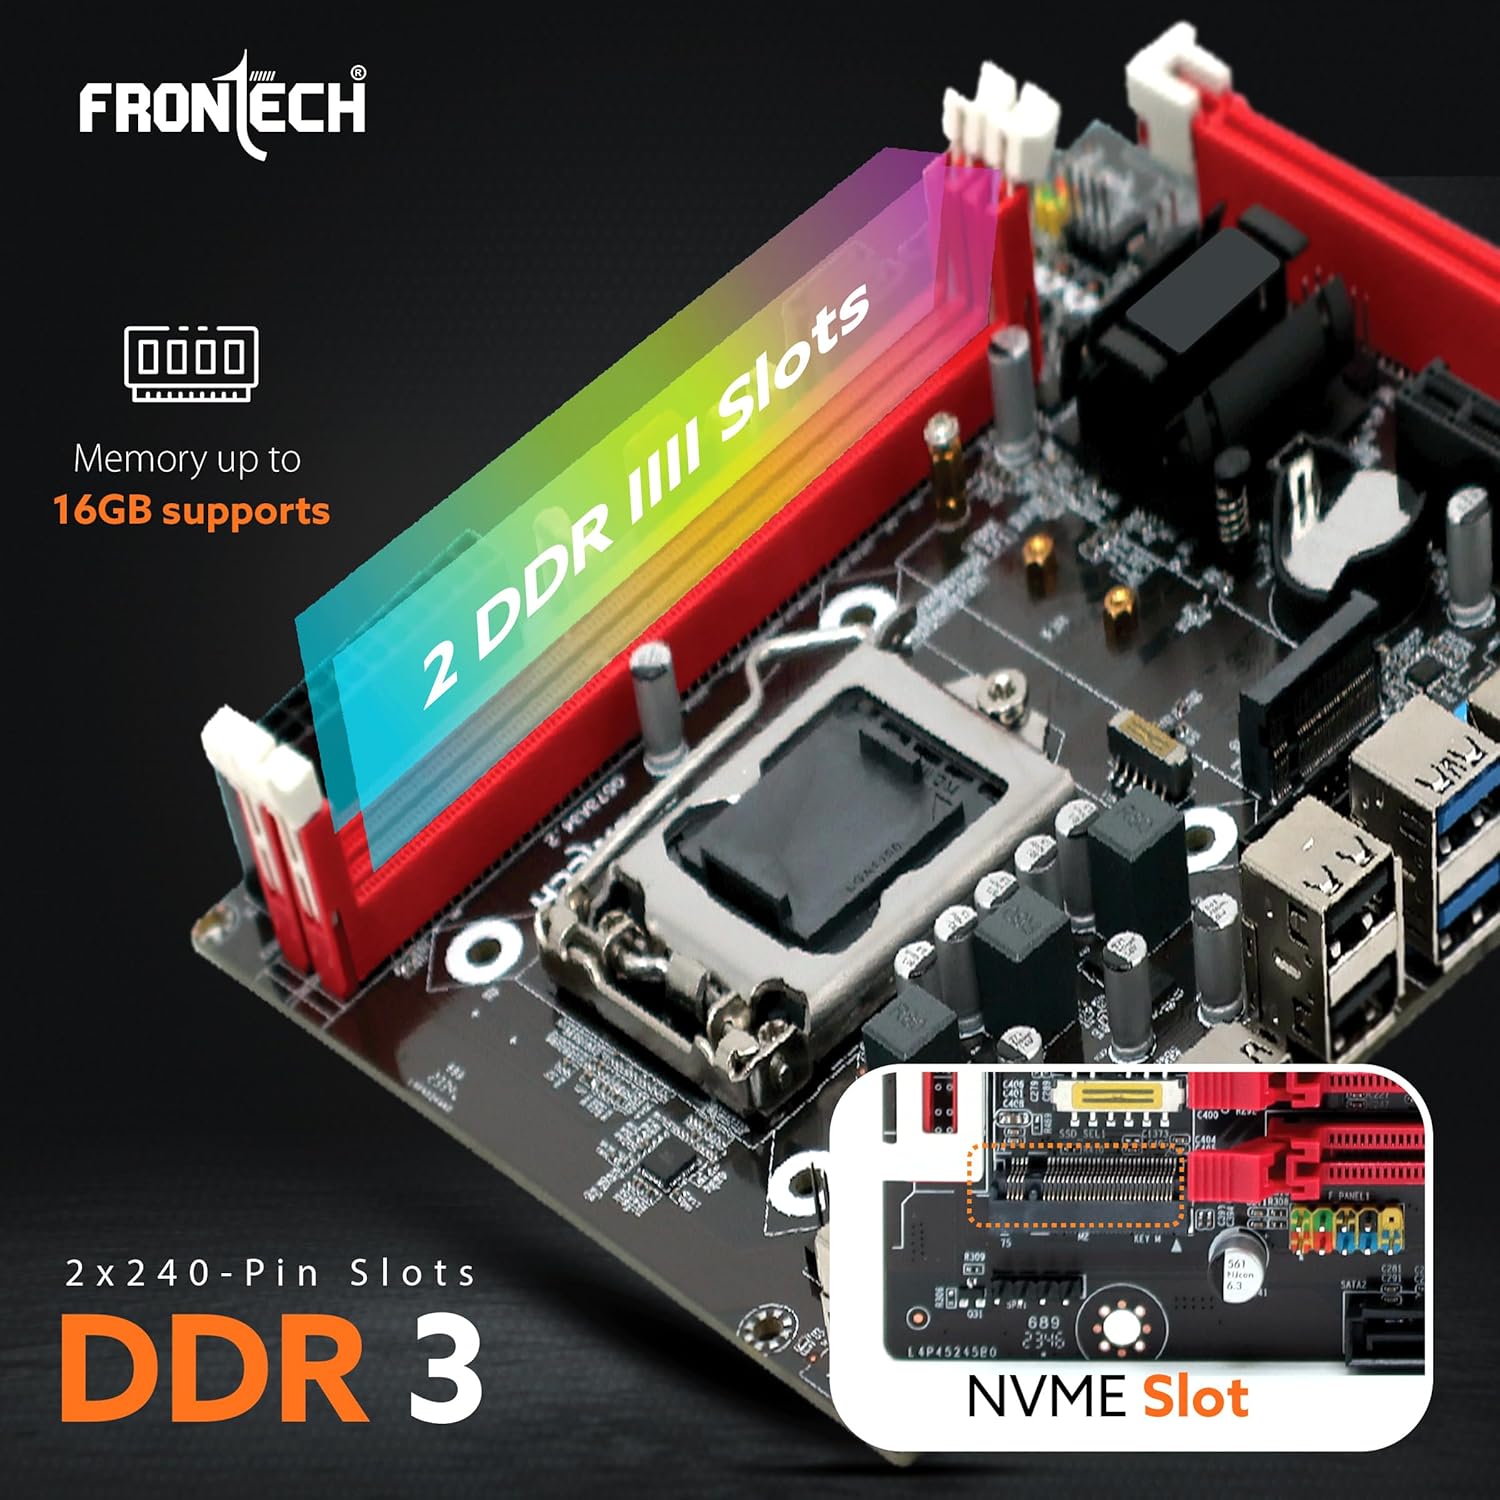
The motherboard supports DDR3 RAM modules. It has two 240-pin DDR3 SD RAM slots.
- Open the retention clips at both ends of the DDR3 memory slot.
- Align the notch on the DDR3 memory module with the key in the memory slot.
- Insert the memory module firmly into the slot until the retention clips snap into place. Ensure both clips are fully closed.

Image: The two DDR3 RAM slots on the FRONTECH H81 Motherboard, supporting up to 16GB memory.
4.3. اسٽوريج ڊيوائس جي انسٽاليشن
The motherboard provides SATA ports for traditional hard drives and SSDs, and an NVMe M.2 slot for high-speed storage.
- SATA ڊرائيوز: Connect one end of the SATA data cable to a SATA port on the motherboard and the other end to your SATA hard drive or SSD. Connect a SATA power cable from your power supply to the drive.
- NVMe M.2 SSD: Locate the NVMe M.2 slot. Insert the NVMe SSD into the slot at an angle, then gently push it down and secure it with the provided screw.
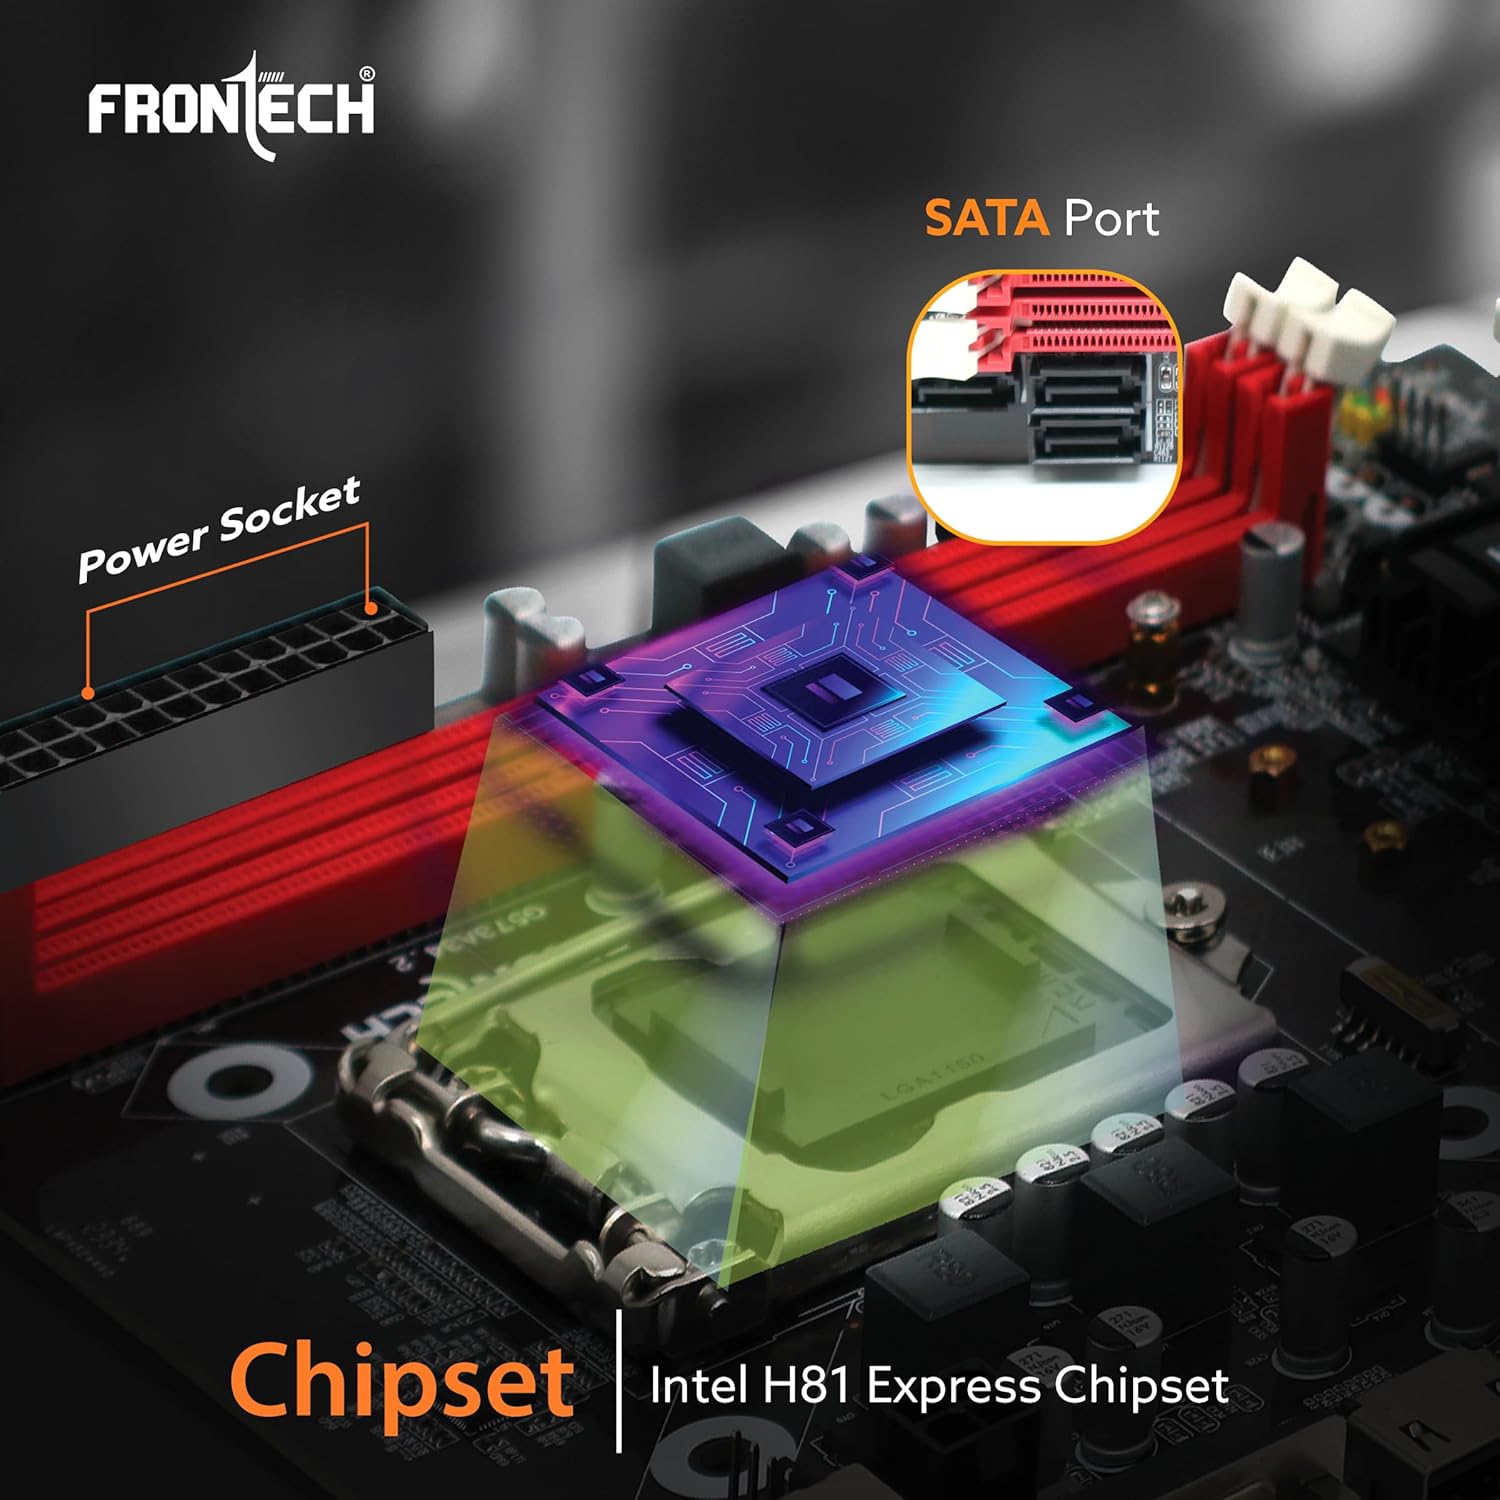
Image: The Intel H81 Express Chipset area, showing SATA ports and the NVMe slot.
4.4. بجلي رابطا
Connect the power supply unit (PSU) cables to the motherboard.
- 24-پن ATX پاور ڪنيڪٽر: Connect the main 24-pin ATX power cable from your PSU to the corresponding connector on the motherboard. Ensure it is firmly seated.
- 4-pin 12V CPU Power Connector: Connect the 4-pin 12V CPU power cable from your PSU to the connector near the CPU socket.
4.5. فرنٽ پينل ۽ I/O ڪنيڪشن
Connect the front panel connectors from your computer case and external peripherals.
- فرنٽ پينل ڪنيڪٽر: Connect the power switch, reset switch, HDD LED, and power LED cables from your case to the F-panel header on the motherboard. Refer to the motherboard diagram for correct pin assignments.
- USB ڪنيڪٽر: Connect front panel USB 2.0 and USB 3.0 cables to the respective USB headers on the motherboard.
- Front Audio Connector: Connect the front panel audio cable to the F-audio header.
- پوئتي I/O بندرگاهن: Connect your monitor to the HDMI or VGA port. Connect USB devices to the available USB 2.0 (4 ports) and USB 3.0 (2 ports) ports. Connect your Ethernet cable to the RJ45 LAN port. Connect audio devices to the 3-in-1 audio jacks.

Image: The FRONTECH H81 Motherboard installed in a PC case, highlighting I/O interfaces and internal connectors.

تصوير: تفصيلي view of the rear I/O panel, showing USB 2.0, VGA, HDMI, USB 3.0, LAN, and audio ports.
5. آپريٽنگ هدايتون
5.1. پهريون بوٽ
After completing all hardware installations, connect your monitor, keyboard, and mouse. Power on your system. The system should display the BIOS POST screen. If not, refer to the Troubleshooting section.
5.2. BIOS سيٽ اپ
BIOS سيٽ اپ يوٽيلٽي ۾ داخل ٿيڻ لاءِ، دٻايو ڊي ايل or F2 key repeatedly during the POST (Power-On Self-Test) process. In the BIOS, you can configure system settings such as boot order, date/time, and hardware parameters. Save changes before exiting the BIOS.
5.3. ڊرائيور لڳائڻ
After installing your operating system, install the necessary drivers for the motherboard components (chipset, audio, LAN, graphics). Drivers are typically provided on a CD/DVD included with the motherboard or can be downloaded from the official FRONTECH webسائيٽ.
6. سار سنڀال
- مٽي هٽائڻ: Regularly clean the inside of your computer case to prevent dust buildup on the motherboard and components, which can lead to overheating. Use compressed air for effective cleaning.
- هوا جو وهڪرو: Ensure that the computer case has adequate airflow. Keep vents clear and ensure fans are functioning correctly.
- BIOS اپڊيٽس: Periodically check the FRONTECH webBIOS اپڊيٽس لاءِ سائيٽ. BIOS اپڊيٽس سسٽم جي استحڪام، مطابقت ۽ ڪارڪردگي کي بهتر بڻائي سگهن ٿا. مدر بورڊ کي نقصان پهچائڻ کان بچڻ لاءِ اپڊيٽ جي هدايتن تي احتياط سان عمل ڪريو.
7. مسئلا حل ڪرڻ
جيڪڏهن توهان کي مسئلا درپيش اچن ٿا، ته هيٺ ڏنل عام مسئلا حل ڪرڻ جي قدمن جو حوالو ڏيو:
- طاقت ناهي: Ensure all power cables (24-pin ATX, 4-pin 12V CPU) are securely connected to the motherboard and the power supply is switched on. Check the power button connection to the F-panel header.
- ڪابه ڊسپلي: Verify that the monitor is connected to the correct video output (HDMI or VGA) on the motherboard or a dedicated graphics card. Reseat the RAM modules and the CPU. If using a dedicated graphics card, ensure it is properly seated and powered.
- سسٽم جي عدم استحڪام/حادثا: Check for proper seating of all components (CPU, RAM, expansion cards). Monitor CPU and system temperatures. Ensure adequate cooling. Test RAM modules individually if possible.
- NVMe SSD Not Detected: Ensure the NVMe SSD is correctly installed in the M.2 slot and secured. Check BIOS settings to ensure the M.2 slot is enabled and configured correctly. Install the necessary NVMe drivers. If issues persist, consider testing with a SATA drive to isolate the problem.
- پردي جا مسئلا: If USB devices or audio ports are not functioning, ensure front panel connectors are correctly attached. Reinstall relevant drivers.
8. وضاحتون
| خاصيت | تفصيل |
|---|---|
| برانڊ | فرونٽيڪ |
| ماڊل | H81/1150 SOCKET DDR3 (FT-0471) |
| چپ سيٽ | Intel H81 Express Chipset |
| سي پي يو ساکٽ | LGA 1150 |
| سپورٽ ٿيل پروسيسرز | Intel 4th Generation Haswell Processors |
| ميموري سلاٽ | 2 x DDR3 DIMM slots (240-pin) |
| ميموري جو قسم | DDR3 1066/1333/1600 MHz, Dual Channel |
| وڌ ۾ وڌ ياداشت | 16 GB تائين |
| اسٽوريج انٽرفيس | 4 x SATA ports (2x SATA 2.0, 2x SATA 3.0), 1 x NVMe M.2 slot |
| USB پورٽ (پوئتي) | 2 x USB 3.0 ، 4 x USB 2.0 |
| وڊيو آئوٽ | 1 x HDMI، 1 x VGA |
| LAN | Integrated Realtek 10/100 Mbps LAN (1000Mbps optional) |
| آڊيو | Integrated Realtek ALC 6-channel HD Audio Codec |
| توسيع سلاٽ | 1 x PCI Express x16, 1 x PCI Express x1 |
| فارم فيڪٽر | ATX (17 x 19 x 2.1 cm) |
| شيءِ جو وزن | 490 جي |
9. وارنٽي ڄاڻ
The FRONTECH H81 Chipset Motherboard comes with a 2 سال وارنٽي from the date of purchase. This warranty covers manufacturing defects and malfunctions under normal use. Please retain your proof of purchase for warranty claims. For detailed warranty terms and conditions, please contact FRONTECH customer support.
10. سپورٽ جي معلومات
For technical assistance, driver downloads, or further inquiries, please contact:
- ٺاهيندڙ: Nuevotech Industries Private Limited
- ائڊريس: Unit-801, EM-4, Sector - V, Kolkata, West Bengal, 700791, India
- درآمد ڪندڙ: Frontech Private Limited, Ecocentre, Unit-801, EM-4, Sector - V, Kolkata, West Bengal, 700091, India
- Webسائيٽ: Refer to the official FRONTECH website for the latest drivers, FAQs, and support resources.