1. تعارف
This manual provides detailed instructions for the installation, operation, and maintenance of your LOFOV 360° 4 Channel Dash Cam, Model RM. Please read this manual thoroughly before using the product to ensure proper function and longevity.

Figure 1: LOFOV 360° 4 Channel Dash Cam and Accessories
2. پيڪيج مواد
پڪ ڪريو ته سڀئي شيون پيڪيج ۾ موجود آهن:
- 1 x Dual Dash Cam Unit
- 1 x Adjustable Suction Mount
- 1 x ريئر ڪيمرا
- 1 x ريئر ڪيمرا ڪيبل
- 1 x Lighter Car Charger Power Cable
- 1 x USB قسم-سي چارجنگ ڪيبل
- 1 x استعمال ڪندڙ دستياب
- 1 x 64GB High-Speed Memory Card (Micro-SD, Class 10 U3)
- 2 x اسڪرو
- 1 x 3M Adhesive Pad

شڪل 2: شامل پيڪيج مواد
3. سيٽ اپ ۽ تنصيب
3.1 Memory Card Preparation
The dash cam requires a micro-SD card (Class 10 U3 speed, up to 256GB max). A 64GB card is included. If formatting the TF card on a computer, ensure it is formatted to FAT32. The exFAT format, common on Windows, is not compatible with this device.
3.2 ڊيش ڪيم لڳائڻ
- Attach the adjustable suction mount to the main dash cam unit.
- Securely mount the dash cam to your vehicle's windscreen, ensuring a clear view روڊ ۽ اندروني حصي جو.
- Connect the rear camera to the main unit using the provided rear camera cable.
- Position the rear camera as desired, typically on the rear windshield.
- Connect the lighter car charger power cable to the dash cam and your vehicle's 12V power outlet.
- Route all cables neatly to avoid obstructing your view يا ڊرائيونگ ۾ مداخلت ڪرڻ.
شڪل 3: تنصيب ڊراگرام
4. آپريٽنگ هدايتون
4.1 پاور آن/آف
The dash cam will automatically power on and begin recording when your vehicle starts. To manually power on/off, press and hold the power button.
4.2 مينيو کي نيويگيٽ ڪرڻ
Use the arrow buttons to navigate through menu options and the OK button to confirm selections. The 'M' button typically accesses the menu or switches modes.
Video 1: Demonstrates how to navigate the menu options and settings on the LOFOV 4 Channel Dash Cam, including resolution, loop recording, and G-sensor settings.
4.3 رڪارڊنگ جا طريقا ۽ خاصيتون
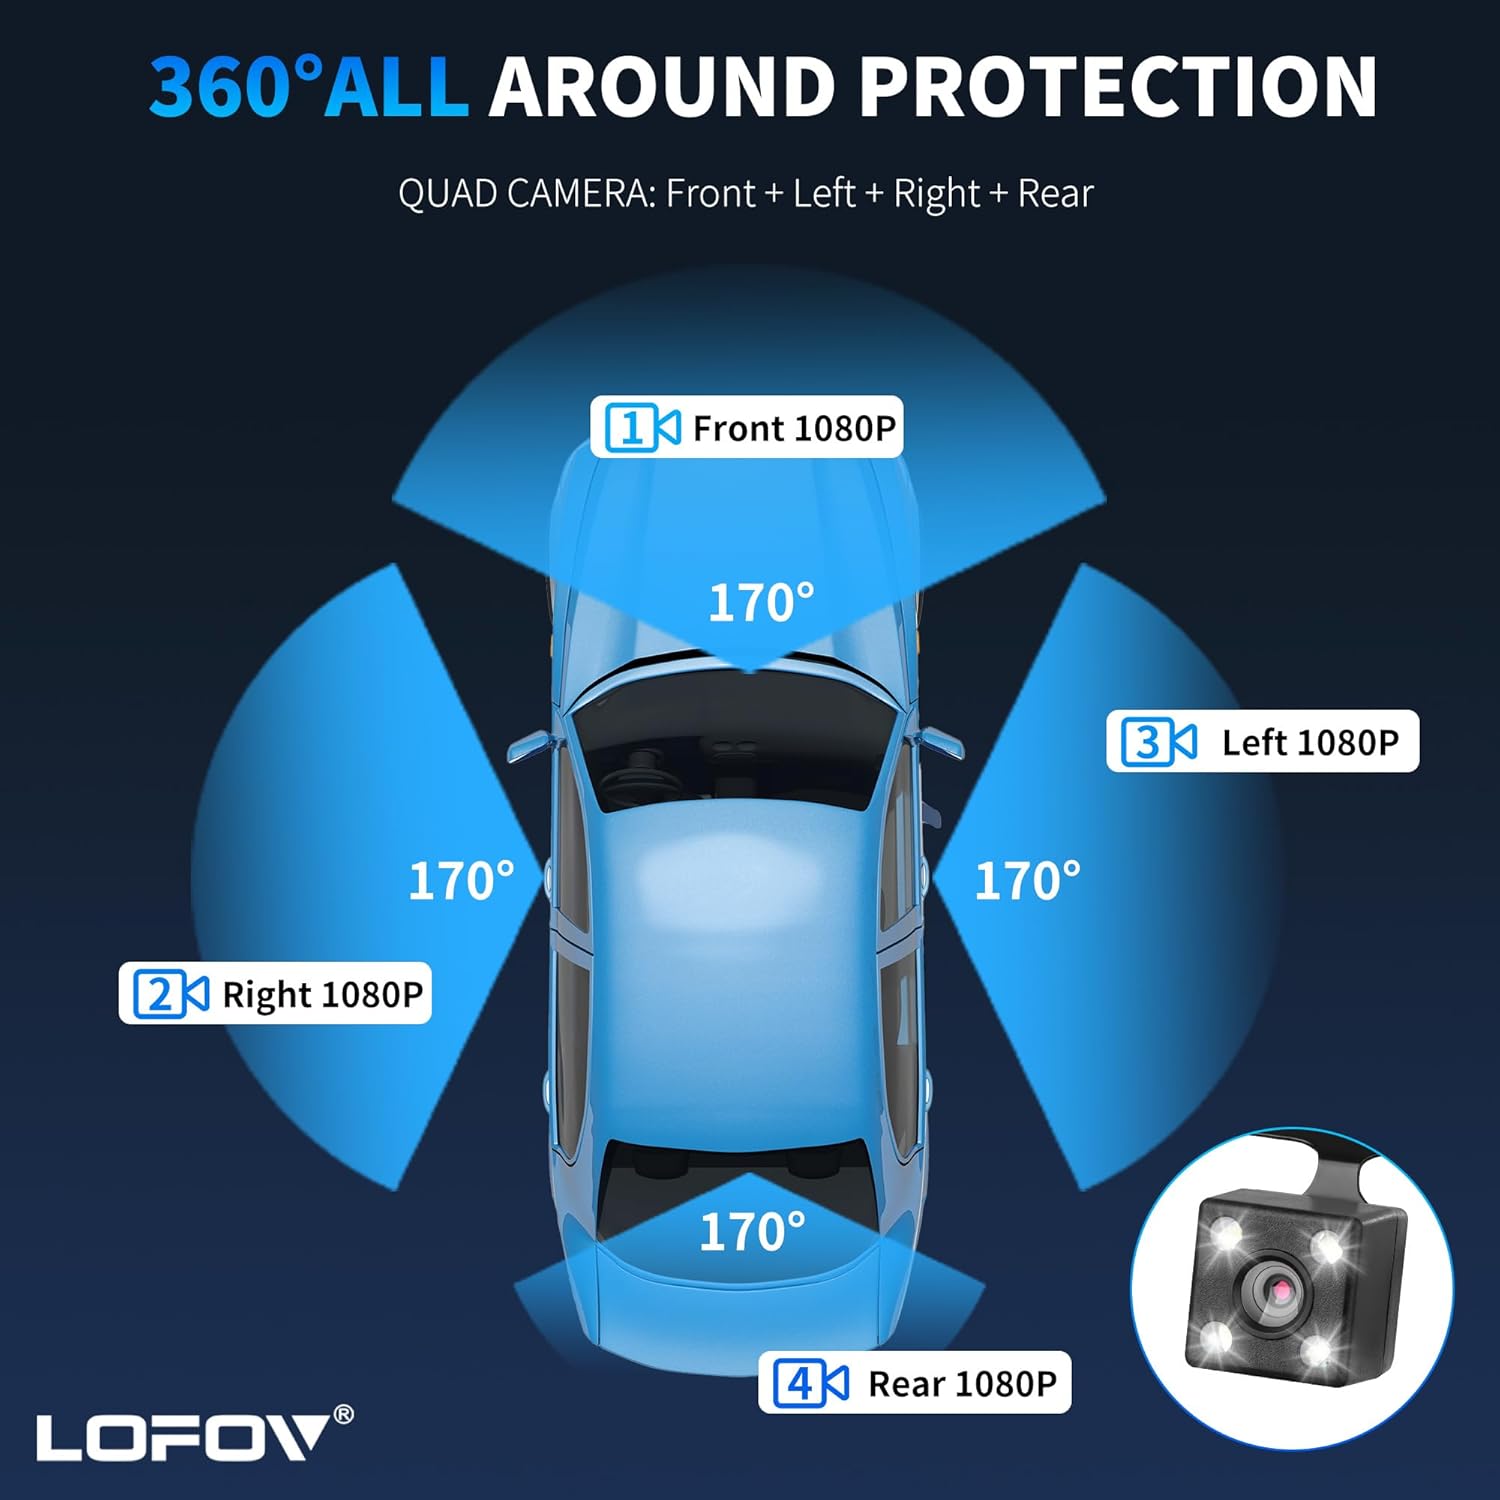
- 360° All-Around Coverage: The dash cam features four lenses (front, rear, left, right) capable of simultaneous FHD 1080P recording. The front three lenses are adjustable for optimal angle capture.
- HD ڊسپلي: Features a 3.0-inch IPS screen for live video feedback.
- سپر نائيٽ ويزن: Equipped with 8 LED infrared lights and Wide Dynamic Range (WDR) technology to enhance clarity in low-light conditions and prevent overexposure. Front, inside, and rear cameras record clear images even in unlit environments.
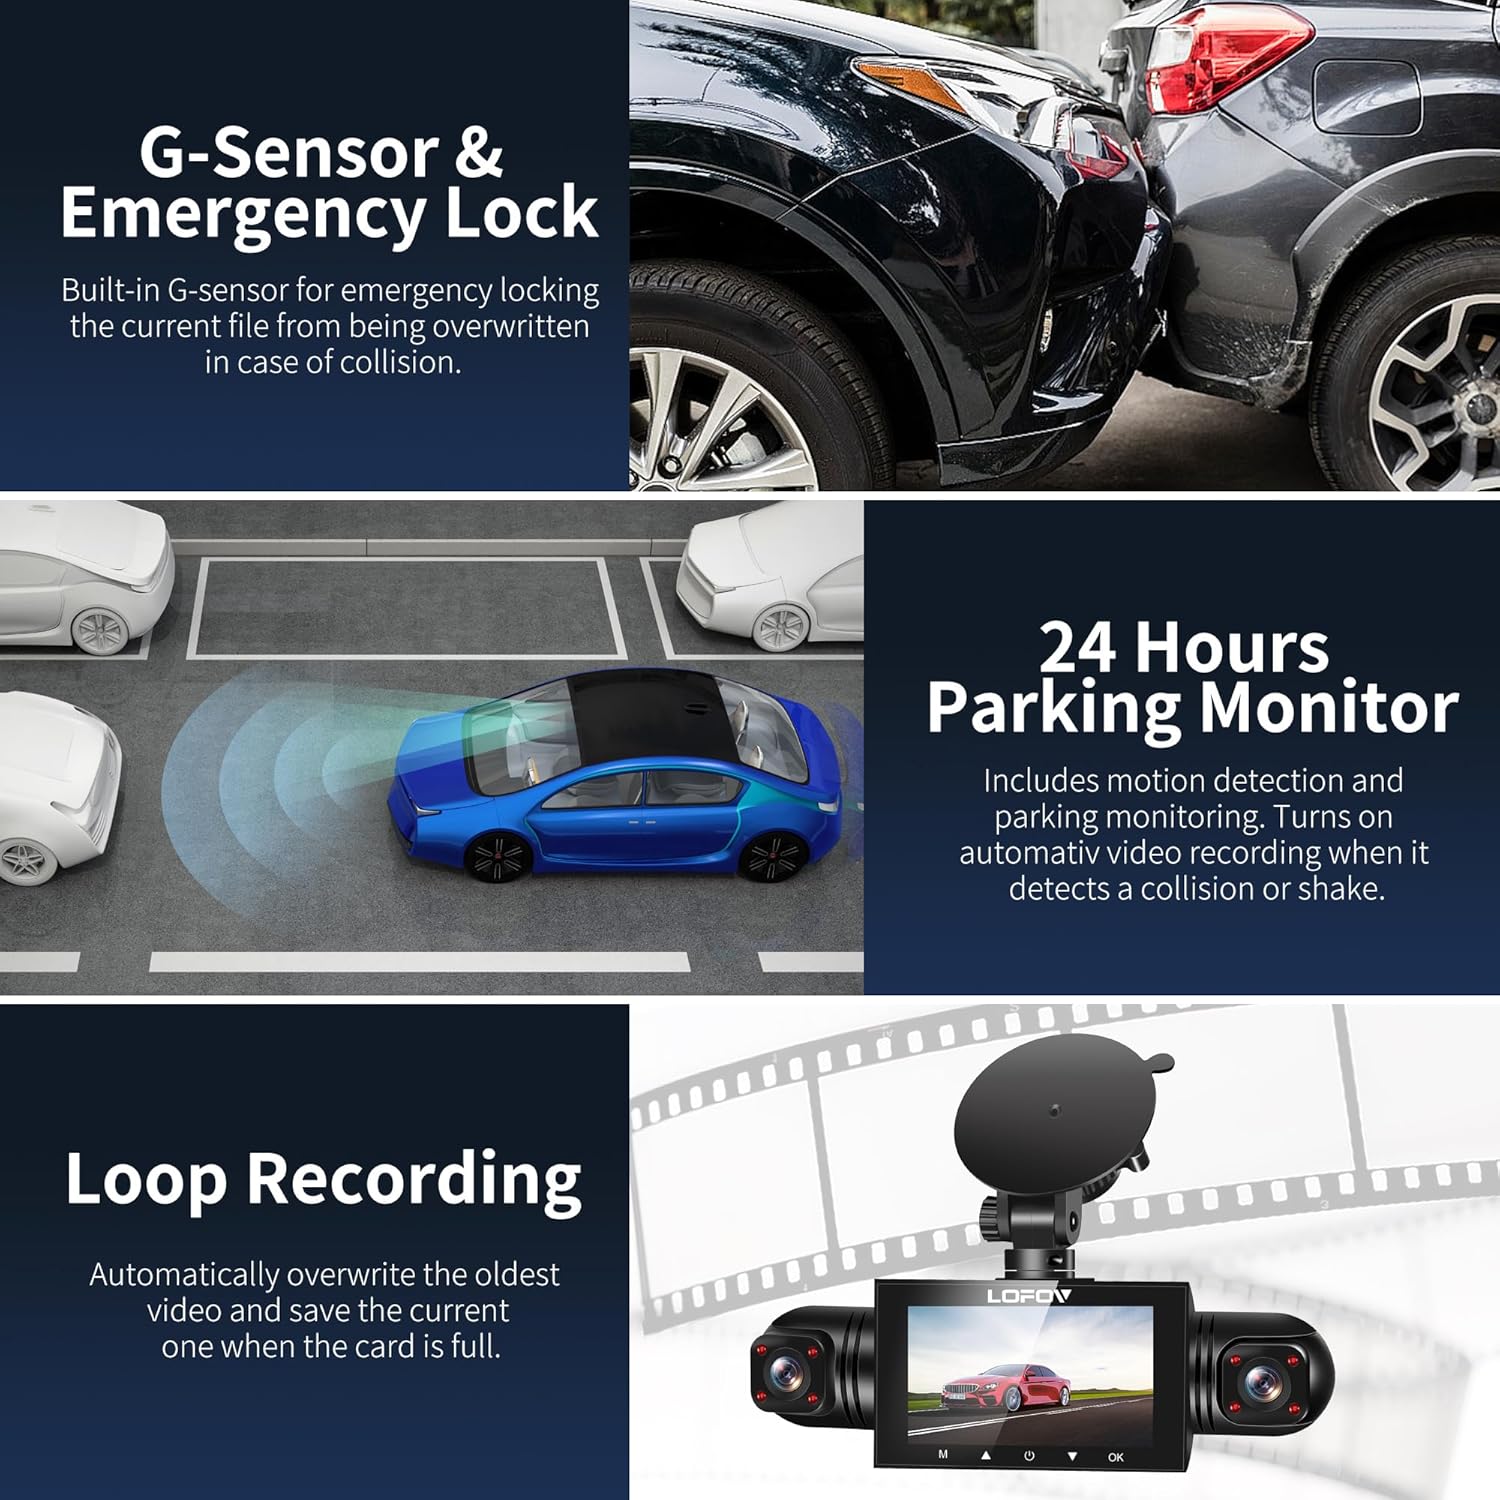
- جي-سينسر ۽ ايمرجنسي لاڪ: The built-in G-sensor automatically detects sudden shakes or collisions, locking the current footage to prevent it from being overwritten during loop recording.
- لوپ رڪارڊنگ: Records video in continuous loops (e.g., 3-minute segments). When the memory card is full, the oldest unlocked videos are automatically overwritten.
- 24-ڪلاڪ پارڪنگ موڊ: When the vehicle is parked and turned off, the dash cam automatically switches to parking mode. It monitors the area around the car and records video for 1 minute upon detecting motion or impact. This feature requires a continuous power supply via a hardwire kit or external battery.

Figure 4: Quad Camera View
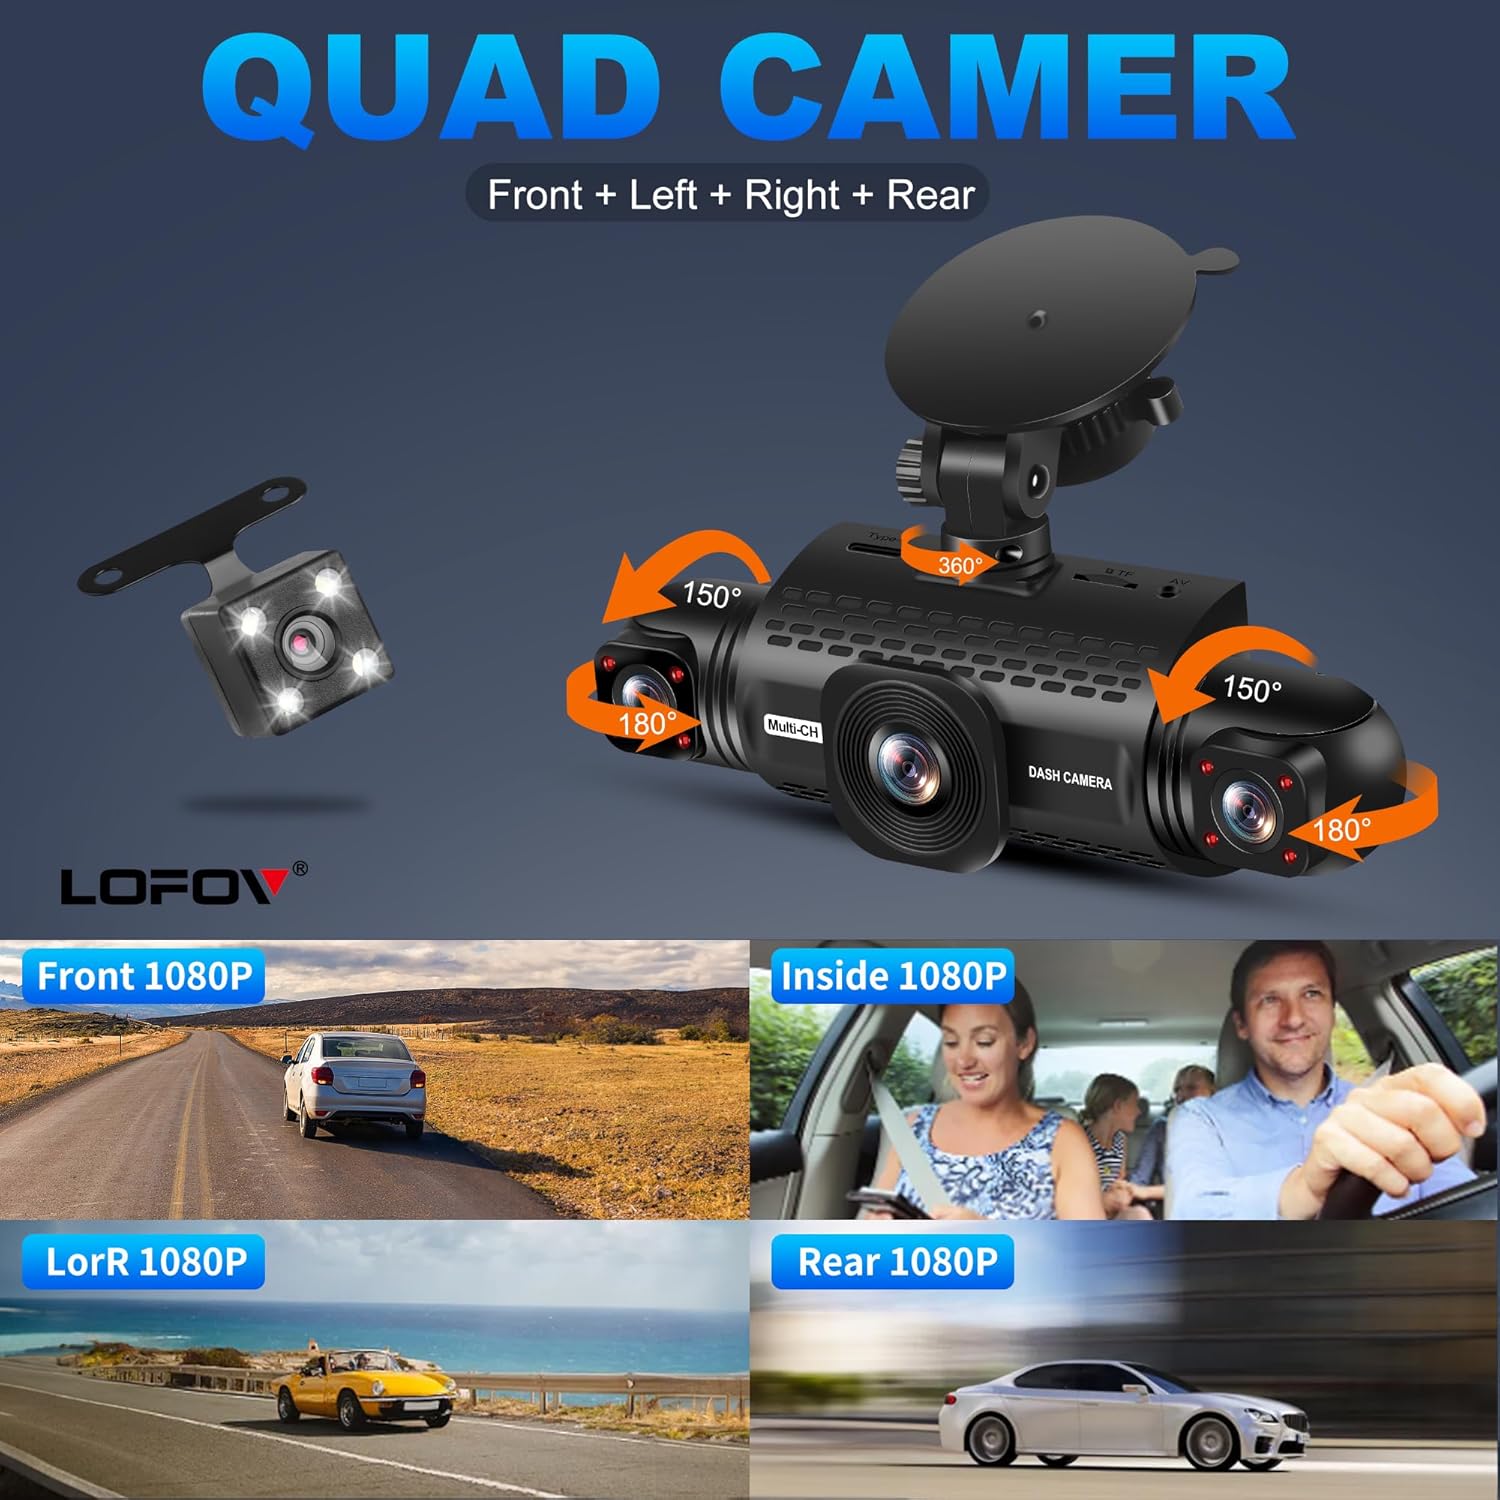
Figure 5: Adjustable Camera Angles

Figure 6: Individual Camera Views (Front, Inside, Left/Right, Rear)

Figure 7: Wide Angle Coverage
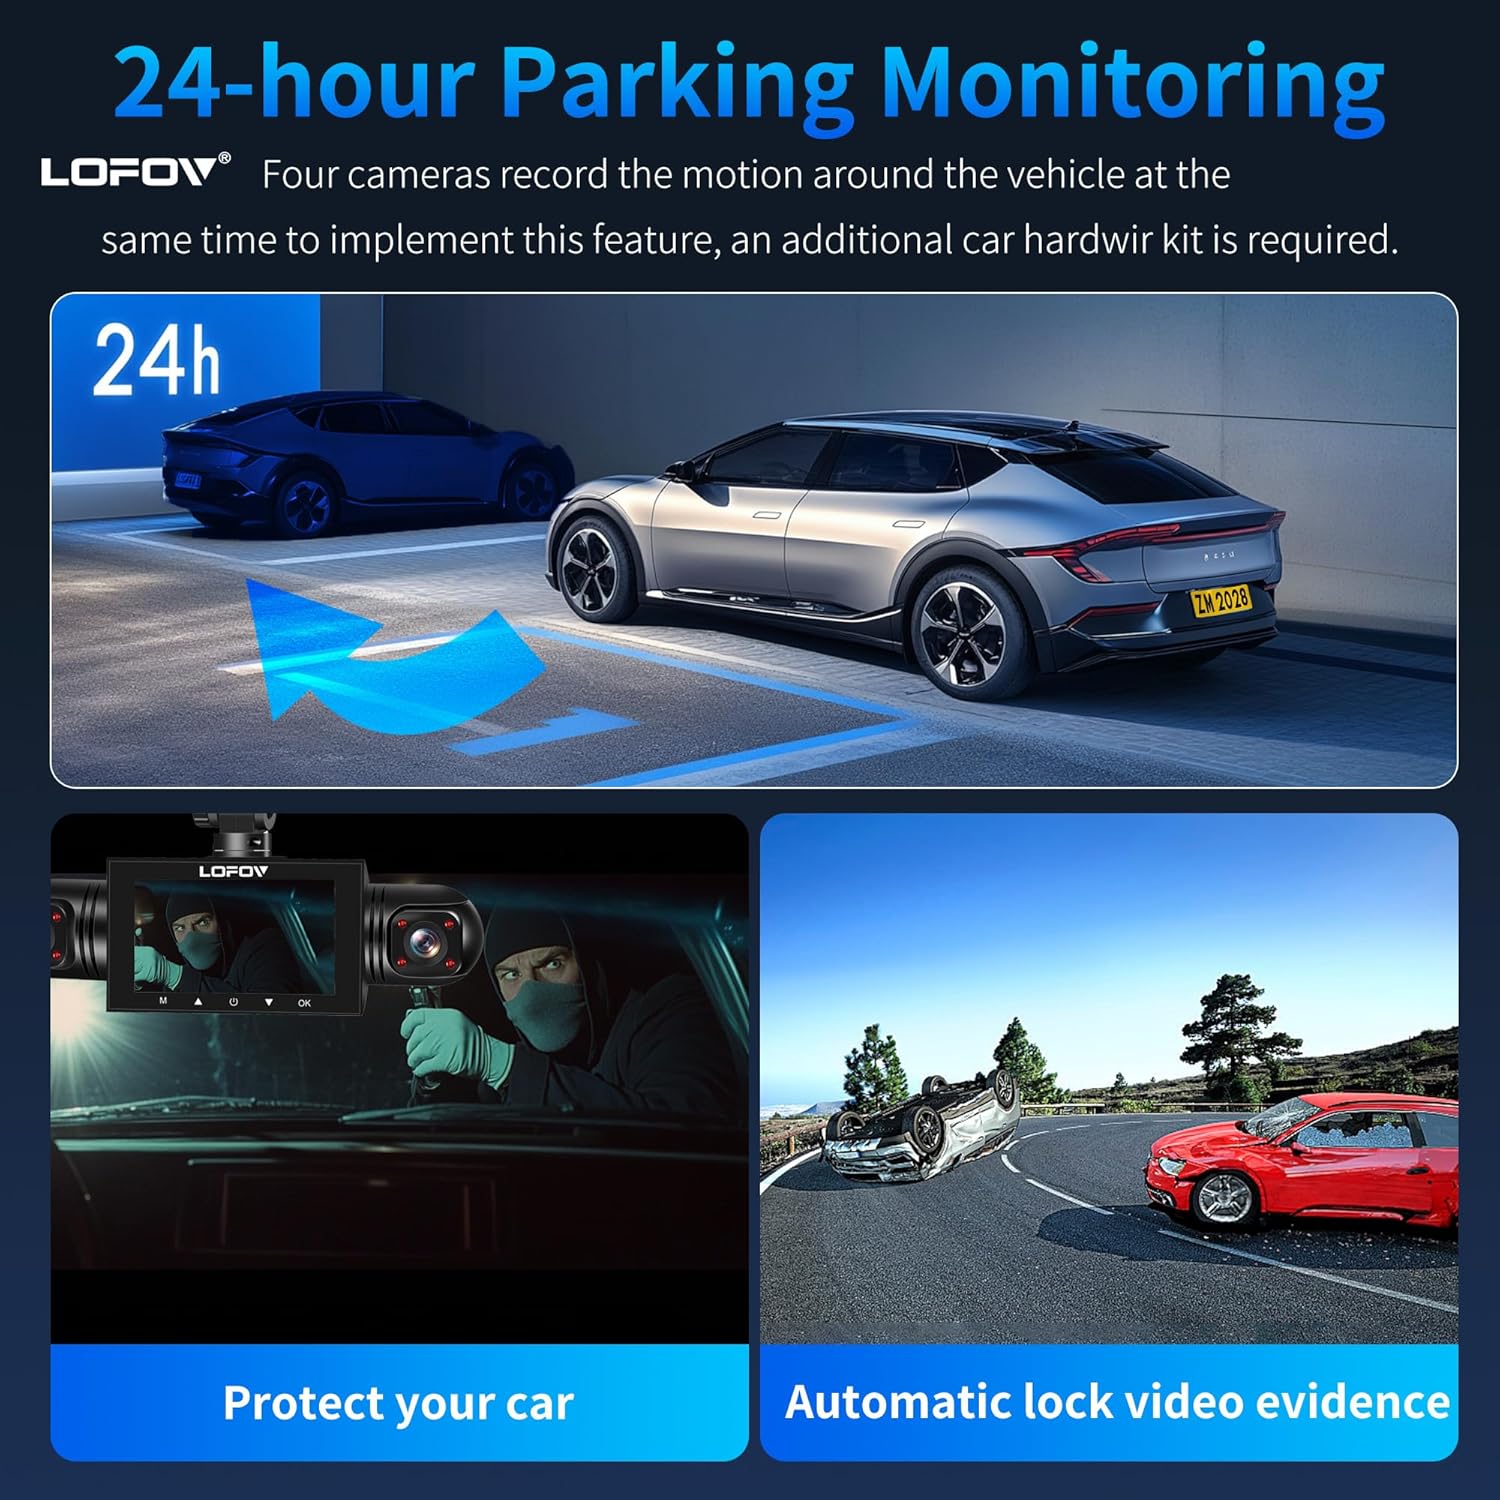
Figure 8: Super Night Vision Performance

Figure 9: Super Night Vision 2.0 & WDR Technology
شڪل 10: 24 ڪلاڪ پارڪنگ جي نگراني

Figure 11: G-Sensor, Parking Monitor, and Loop Recording

Figure 12: Safe Parking Features
5. سار سنڀال
5.1 ميموري ڪارڊ جو انتظام
Regularly format the memory card within the dash cam's settings to ensure optimal performance and prevent data corruption. Back up important footagفارميٽنگ کان اڳ.
5.2 صفائي
Wipe the camera lenses and screen with a soft, lint-free cloth. Avoid using abrasive cleaners or solvents that could damage the device.
5.3 درجه حرارت جي مزاحمت
The dash cam is designed to operate in temperatures ranging from -4°F to 140°F (-20°C to 60°C). Operating outside this range may affect performance or damage the device.

Figure 13: Temperature Resistance Range
6. مسئلا حل ڪرڻ
- ڊوائيس تي طاقت نه آهي: Ensure the power cable is securely connected to both the dash cam and the vehicle's power outlet. Check the vehicle's 12V outlet for power.
- رڪارڊنگ جا مسئلا:
- Ensure the memory card is inserted correctly and is not full.
- Format the memory card regularly to prevent data corruption.
- Verify loop recording settings are configured as desired.
- خراب وڊيو معيار:
- ڪئميرا لينس صاف ڪريو.
- Check the resolution settings in the menu (2K, 1080P, 720P).
- Ensure WDR and Night Vision features are enabled for low-light conditions.
- جي-سينسر حساسيت: If the G-sensor is too sensitive, it may lock too many files. Adjust the sensitivity setting in the menu to a lower level if needed.
- پارڪنگ موڊ ڪم نه ڪري رهيو آهي: Ensure the dash cam is connected to a continuous power supply (hardwire kit or external battery) for 24-hour parking mode functionality.
- Difficulty Navigating Menus: Refer to Video 1 in the Operating Instructions section for a visual guide on menu navigation.
7. وضاحتون
| برانڊ | لوفوف |
| ماڊل نالو | RM |
| رنگ | اڇو |
| پيداوار جي ماپ | 3.15"ڊي x 4.33"ڊي x 8.66"ايڇ |
| شيءِ جو وزن | 14.4 اونس |
| آپريشن موڊ | لڳاتار |
| شامل اجزاء | SD Card (64GB) |
| خاص خاصيتون | 360 Degree, Voice Control, 24-Hour Radar Detection Parking Monitoring, Automatic Incident Detection, Blind Spot Detection, Built-In Microphone, Built-In Speaker, Compact Design, G-Sensor, Internal Memory, Loop Recording, Motion Sensing, Mute Function, Night Vision, Parking Monitor, Reverse Assist |
| آپريٽنگ جي درجه حرارت جي حد | -4°F کان 140°F (-20°C کان 60°C) |
| يو پي سي | 677899491419 |
| ASIN | B0DL2PFX4H |
8. وارنٽي ۽ سپورٽ
For warranty information or technical support, please refer to the contact details provided with your product packaging or visit the official LOFOV website. Additional protection plans may be available for purchase from authorized retailers.