1. تعارف
خريد ڪرڻ لاءِ مهربانيasing the Sharp XL-HF201P Micro Hi-Fi System. This system is designed to provide high-quality audio playback from various sources, including CDs, USB devices, and iPods. This manual provides essential information for the safe and efficient operation of your new audio system. Please read it thoroughly before use and retain it for future reference.
2. اهم حفاظتي ڄاڻ
- طاقت جو ذريعو: يونٽ کي صرف وول جي اي سي آئوٽليٽ سان ڳنڍيوtagيونٽ جي پوئين پينل تي بيان ڪيل.
- وينٽيليشن: مناسب وينٽيليشن کي يقيني بڻايو. وينٽيليشن جي سوراخن کي بلاڪ نه ڪريو. يونٽ کي نرم سطحن تي رکڻ کان پاسو ڪريو جيڪي وينٽن کي بلاڪ ڪري سگهن ٿيون.
- پاڻي ۽ نمي: يونٽ کي مينهن، نمي، يا ٽِپڻ/ڇڏڻ واري مائع جي سامهون نه رکو. يونٽ تي مائع سان ڀريل شيون، جهڙوڪ گلدان، نه رکو.
- گرمي: يونٽ کي گرمي جي ذريعن جهڙوڪ ريڊيئيٽر، گرمي رجسٽر، اسٽو، يا ٻين سامان کان پري رکو (بشمول ampلائفائرز) جيڪي گرمي پيدا ڪن ٿا.
- صفائي: صفائي ڪرڻ کان اڳ يونٽ کي ڀت جي آئوٽليٽ مان ڪڍو. صرف سڪل ڪپڙو استعمال ڪريو.
- خدمت ڪرڻ: ھن پراڊڪٽ کي پنھنجي خدمت ڪرڻ جي ڪوشش نه ڪريو. س servني خدمتن جو حوالو ڏيو قابل سروس اهلڪارن کي.
3. پيڪيج مواد
مھرباني ڪري پڪ ڪريو ته ھيٺ ڏنل سڀ شيون توھان جي پيڪيج ۾ شامل آھن:
- Main Unit (CD Player/Receiver)
- Left Speaker (x1)
- Right Speaker (x1)
- ريموٽ ڪنٽرول (2 AA بيٽرين سان)
- ايف ايم اينٽيننا
- AM لوپ اينٽيننا
- پاور ڪنڊ
- هدايت نامو (هي دستاويز)
4. سيٽ اپ
4.1 Unpacking ۽ لڳائڻ
Carefully remove all components from the packaging. Place the main unit and speakers on a stable, flat surface. Ensure there is sufficient space around the unit for proper ventilation.
4.2 اسپيڪرز کي ڳنڍڻ
Connect the speaker wires to the corresponding terminals on the main unit and speakers. Match the positive (+) and negative (-) terminals. For optimal sound, ensure the wires are securely connected. If the speaker wires do not insert directly into the screw-knobs, wrap the bare wire ends around the terminal posts and then tighten the screw-knobs to secure them.
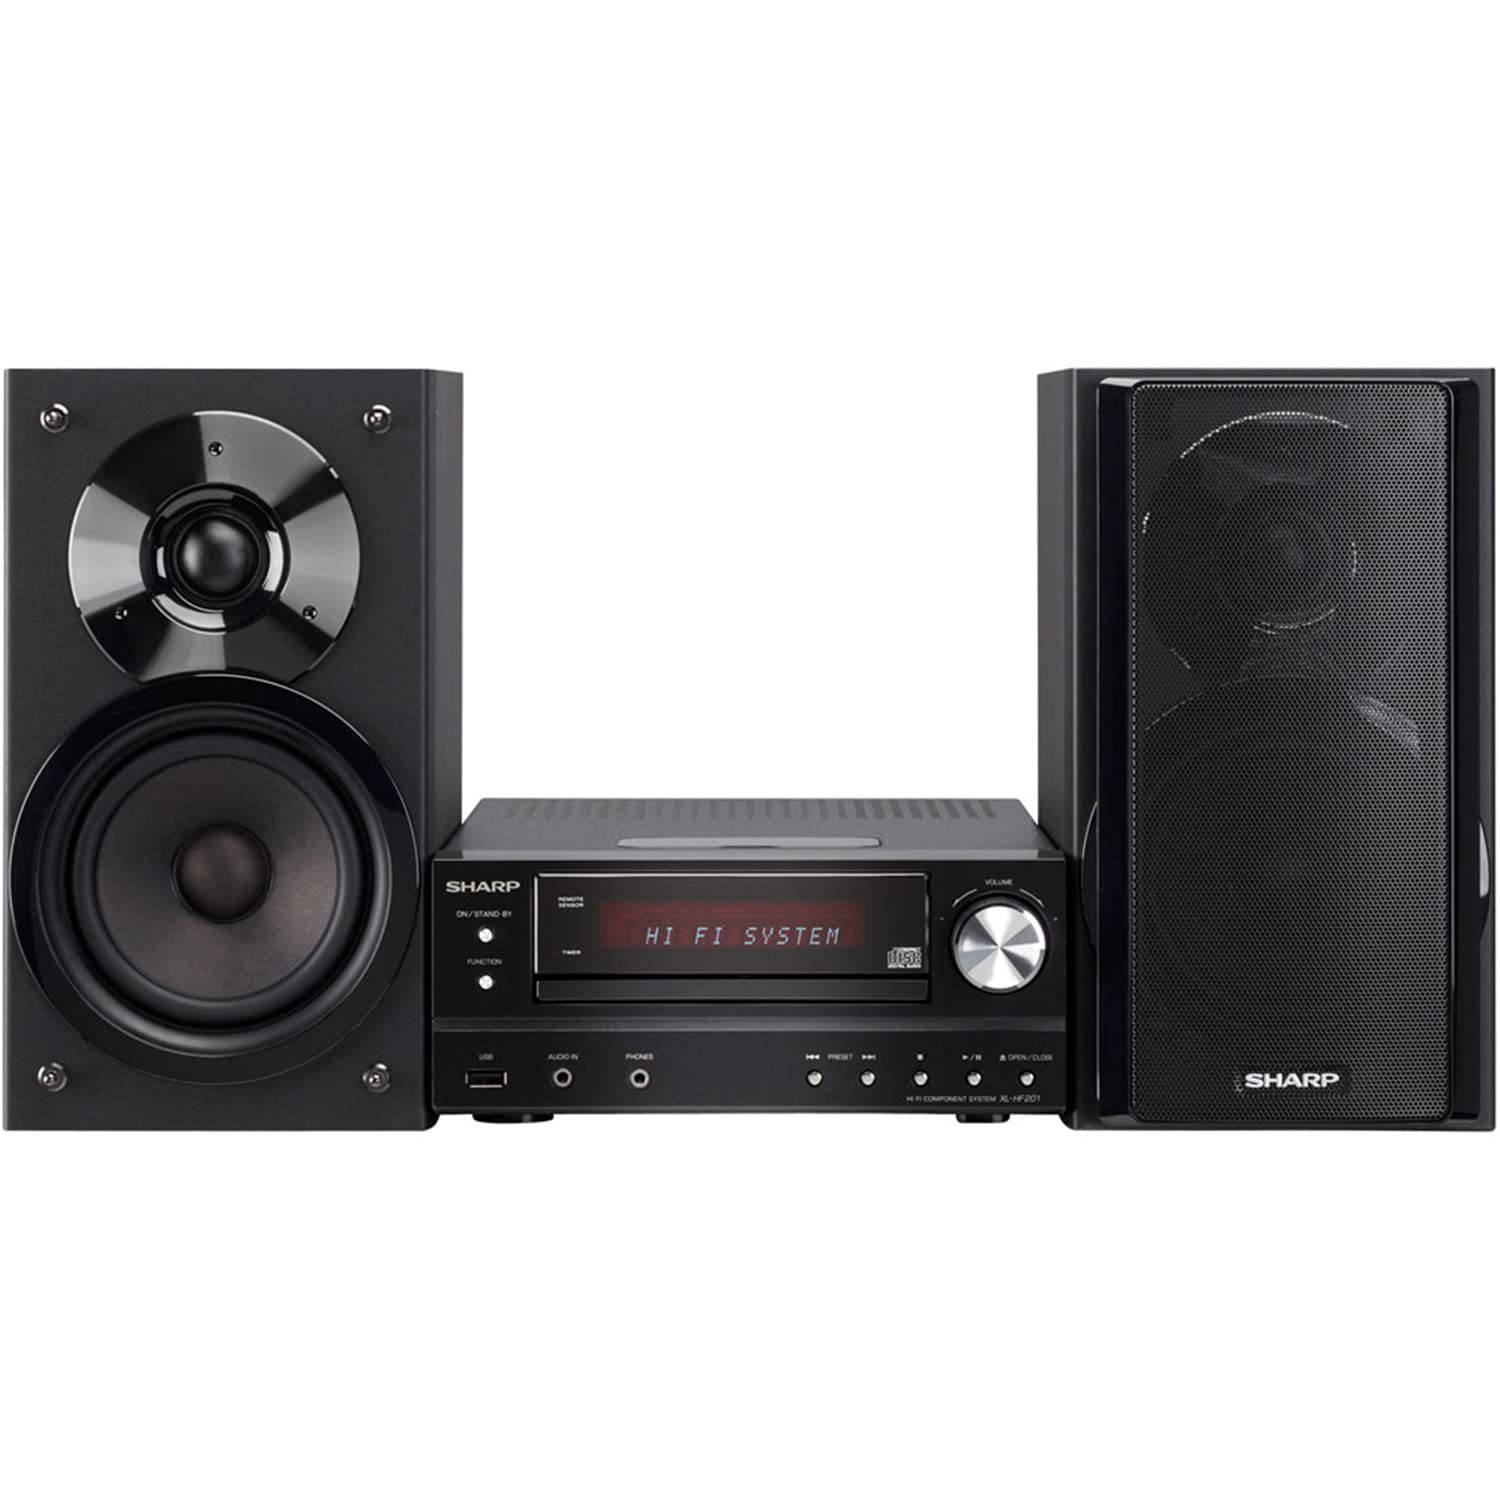
Image 4.2.1: The Sharp XL-HF201P Micro Hi-Fi System, showing the main unit and two speakers. This image illustrates the overall appearance of the system, which includes a central receiver with a CD tray and an iPod dock on top, flanked by two dark-colored speakers.
4.3 Connecting the Antennas
- ايف ايم انٽنا: Connect the supplied FM wire antenna to the FM antenna terminal on the rear of the main unit. Extend the wire for better reception.
- ايم اينٽيننا: Assemble the AM loop antenna and connect it to the AM antenna terminals. Position the antenna for optimal AM reception.
4.4 پاور ڪنيڪشن
After all other connections are made, plug the power cord into the AC inlet on the rear of the main unit, then plug the other end into a wall outlet.
5. آپريٽنگ هدايتون
5.1 پاور آن/آف
کي دٻايو پاور يونٽ کي آن يا آف ڪرڻ لاءِ فرنٽ پينل يا ريموٽ ڪنٽرول تي بٽڻ (اسٽينڊ بائي موڊ).
5.2 ماخذ جي چونڊ
کي دٻايو فنڪشن button on the front panel or the remote control repeatedly to cycle through available sources: CD, USB, iPod, FM, AM, AUX.
5.3 سي ڊي پلے بیک
- منتخب ڪريو CD فنڪشن.
- کي دٻايو کوليو/ بند ڪريو سي ڊي ٽري کولڻ لاءِ بٽڻ دٻايو.
- Place a CD (CD-DA, MP3, WMA) with the label side up on the tray.
- دٻايو کوليو/ بند ڪريو ٽري کي بند ڪرڻ لاءِ ٻيهر. پلے بیک پاڻمرادو شروع ٿي ويندو.
- استعمال ڪريو راند/روڪ, اسٽاپ, SKIP (forward/backward) buttons for control.
5.4 USB پلے بیک
- Insert a USB device (containing MP3 or WMA files) سامهون واري پينل تي USB پورٽ ۾.
- منتخب ڪريو USB فنڪشن.
- Playback will begin automatically or you may need to select a track.
- استعمال ڪريو راند/روڪ, اسٽاپ, SKIP ڪنٽرول لاء بٽڻ.
5.5 iPod/iPhone Dock
- Carefully place your compatible iPod or iPhone onto the dock connector on top of the main unit.
- منتخب ڪريو آئي پوڊ فنڪشن.
- Your device will begin charging and you can control playback using the system's remote or your device's controls.
5.6 ريڊيو ٽيوننگ
- منتخب ڪريو FM or AM فنڪشن.
- استعمال ڪريو ٽيوننگ buttons (or knob on the unit) to manually tune to a station.
- کي دٻايو ۽ رکو ٽيوننگ buttons for automatic station scanning.
- اسٽيشنن کي اڳواٽ سيٽ ڪرڻ لاءِ، گهربل اسٽيشن تي ٽيون ڪريو، پوءِ دٻايو ياداشت ان کان پوءِ هڪ پري سيٽ نمبر بٽڻ.
5.7 حجم ڪنٽرول
حجم کي استعمال ڪندي ترتيب ڏيو کول +/- buttons on the remote control or the volume knob on the main unit.
6. سار سنڀال
6.1 يونٽ جي صفائي
Wipe the exterior of the unit with a soft, dry cloth. Do not use abrasive cleaners, waxes, or solvents as they may damage the finish. For stubborn stains, lightly dampen the cloth with water and mild detergent, then wipe dry.
6.2 سي ڊي لينس ڪيئر
Avoid touching the CD lens. If the lens becomes dirty, use a commercially available CD lens cleaner. Do not use compressed air or liquid cleaners directly on the lens.
7. مسئلا حل ڪرڻ
| مسئلو | ممڪن سبب | حل |
|---|---|---|
| طاقت نه آهي | بجلي جي تار محفوظ طريقي سان ڳنڍيل نه آهي. | يونٽ ۽ وال آئوٽليٽ سان پاور ڪنڊ ڪنيڪشن چيڪ ڪريو. |
| آواز ڪونهي | Volume is too low or muted. Speaker wires are not connected correctly. | Increase volume. Check speaker wire connections, ensuring correct polarity (+/-). |
| سي ڊي نه پئي هلي. | CD is dirty, scratched, or inserted incorrectly. Incorrect function selected. | Clean or replace CD. Insert CD with label side up. Select CD function. |
| USB ڊوائيس سڃاڻي نه سگهيو آهي | USB ڊوائيس صحيح طرح فارميٽ ٿيل نه آهي يا ان ۾ غير معاونت ٿيل آهي files. | Ensure USB device is FAT16/FAT32 formatted and contains MP3/WMA files. Try another USB device. |
| ناقص ريڊيو استقبال | Antenna not properly positioned or connected. Interference. | اينٽينا جي پوزيشن کي ترتيب ڏيو. يونٽ کي ٻين اليڪٽرانڪ ڊوائيسز کان پري منتقل ڪريو. |
| ريموٽ ڪنٽرول ڪم نه ڪري رهيو آهي | Batteries are depleted or inserted incorrectly. Obstruction between remote and unit. | Replace batteries (2 AA). Ensure clear line of sight to the unit's remote sensor. |
8. وضاحتون
- برانڊ: تيز
- ماڊل: XL-HF201P
- ٻاھر نڪرڻ جي طاقت: 100 واٽس آر ايم ايس
- سپورٽ ميڊيا: CD-DA, MP3, WMA (CD, USB)
- رابطي: USB, iPod Dock, AUX Input, FM/AM Tuner
- اسپيڪر جو قسم: Subwoofers (integrated into speaker design)
- طاقت جو ذريعو: تار ٿيل برقي
- پيداوار جا طول و عرض (مکيه يونٽ): تقريبن 13 x 15.09 x 20.15 انچ
- شيء جو وزن: تقريبن 20.3 پائونڊ
- بيٽريون (ريموٽ): 2 AA بيٽريون (شامل)
9. وارنٽي ۽ سپورٽ
For warranty information and customer support, please refer to the warranty card included with your product or visit the official Sharp website. You may also contact Sharp customer service directly for assistance with product registration, technical support, or service inquiries.
آن لائن سپورٽ: www.sharpusa.com


