1. تعارف
This manual provides comprehensive instructions for the installation, operation, and maintenance of the Supermicro X10SLM+-LN4F motherboard. Designed for server applications, this motherboard features an LGA1150 socket, Intel C224 PCH, DDR3 memory support, and multiple Gigabit Ethernet ports. Please read this manual thoroughly before proceeding with installation to ensure proper setup and optimal performance.
2. پراڊڪٽ ختمview
The Supermicro X10SLM+-LN4F is a microATX server motherboard built for reliability and performance. Key features include:
- LGA1150 Socket for Intel Xeon E3-1200 v3/v4 and 4th Gen Core i3 processors.
- Intel C224 PCH chipset.
- Four DDR3 DIMM slots supporting up to 64GB ECC/non-ECC UDIMM.
- Multiple SATA3 (6Gbps) ports.
- Integrated quad Gigabit Ethernet ports.
- USB 3.0 and USB 2.0 support.
- VGA output for integrated graphics.
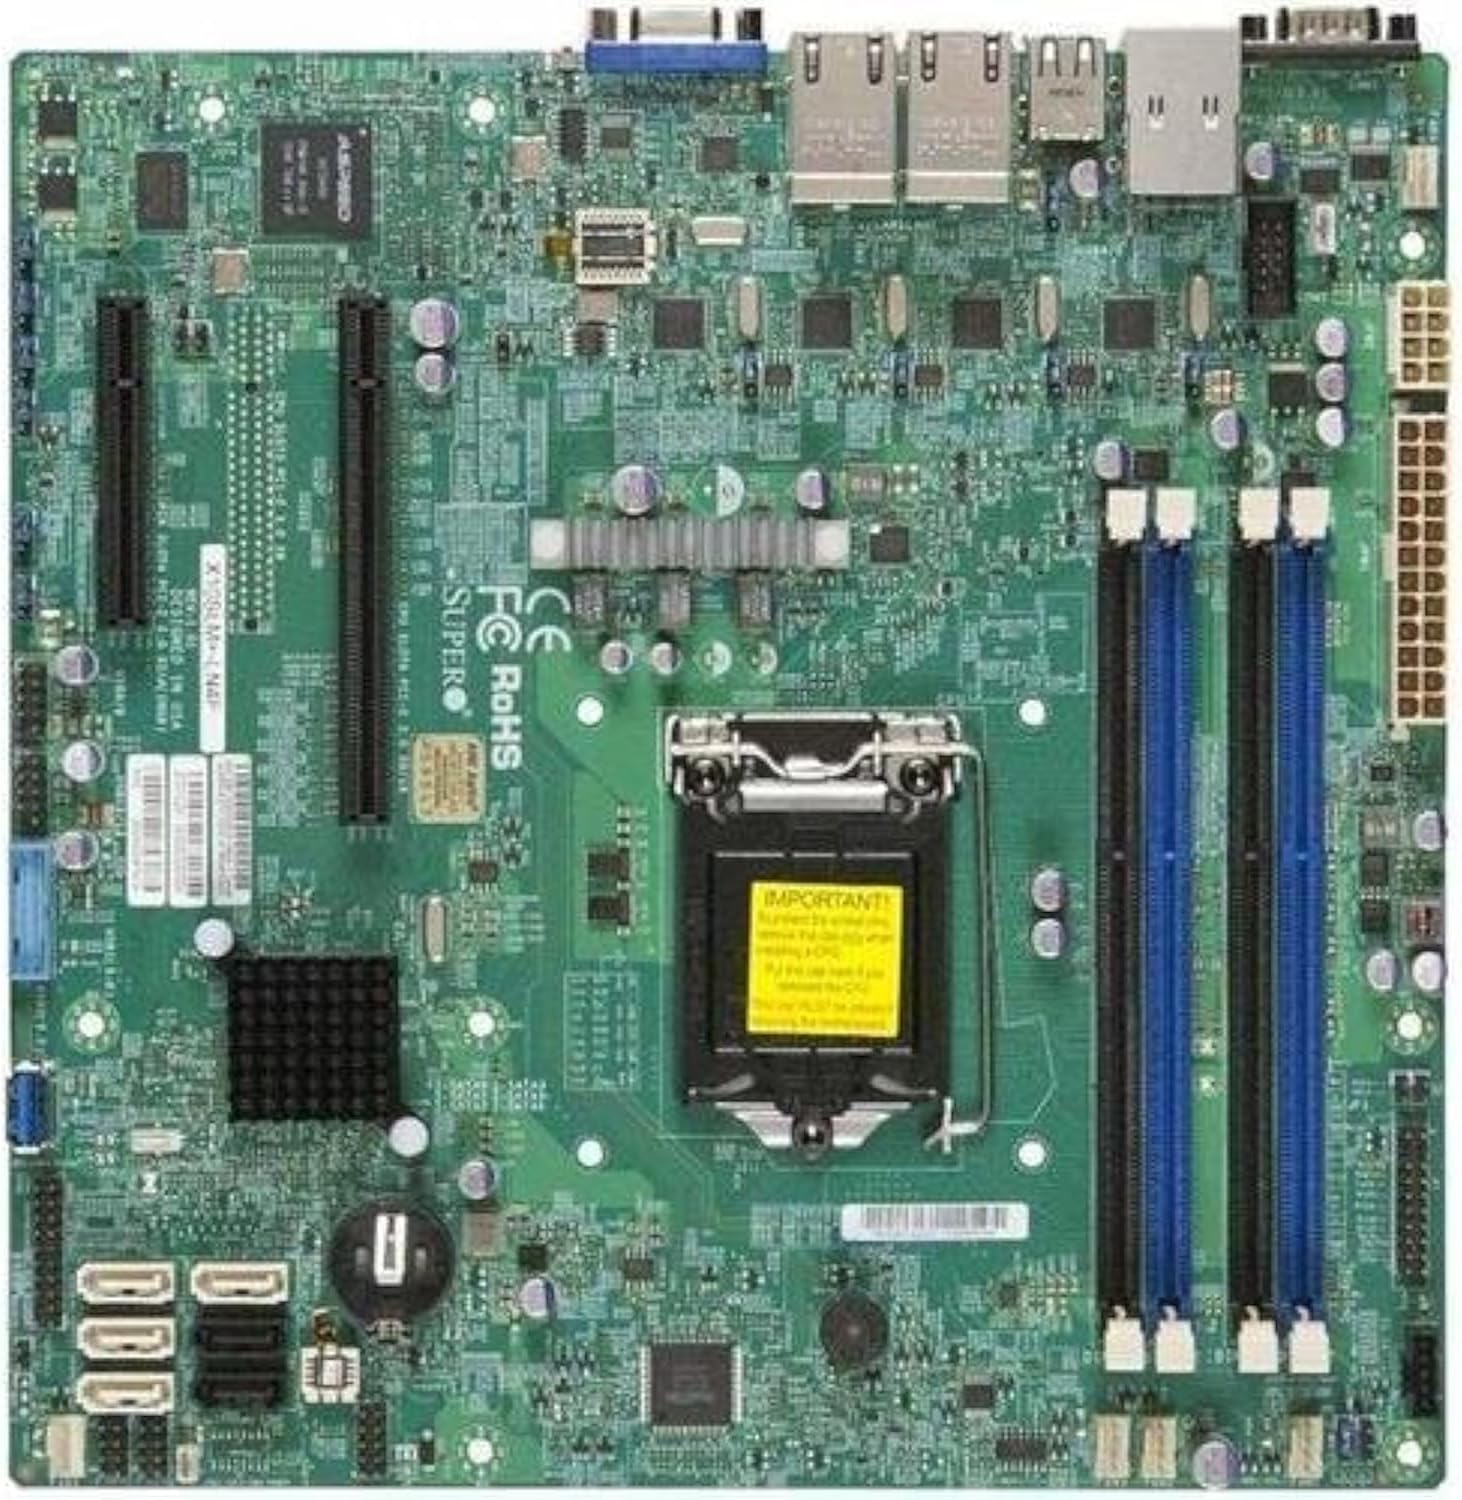
شڪل 2.1: مٿي کان هيٺ view of the Supermicro X10SLM+-LN4F motherboard, showing the CPU socket, DIMM slots, PCIe slots, and various connectors.

شڪل 2.2: زاويه view of the motherboard, highlighting the layout of components and expansion slots.
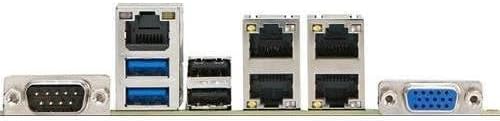
شڪل 2.3: Rear I/O panel of the Supermicro X10SLM+-LN4F motherboard, featuring multiple LAN ports, USB ports, and serial ports.
3. سيٽ اپ ۽ تنصيب
انسٽاليشن شروع ڪرڻ کان اڳ، پڪ ڪريو ته توهان جو سسٽم پاور آف آهي ۽ پاور سورس کان ڌار ٿيل آهي. اجزاء کي اليڪٽرو اسٽيٽڪ ڊسچارج (ESD) نقصان کان بچائڻ لاءِ اينٽي اسٽيٽڪ کلائي پٽي پائڻ.
3.1. سي پي يو جي انسٽاليشن
- مدر بورڊ تي LGA1150 CPU ساکٽ ڳوليو.
- لوڊ ليور کي نرميءَ سان دٻايو ۽ ان کي پاسي ڏانهن ڇڪيو ته جيئن سي پي يو ساکٽ برقرار رکڻ وارو فريم کوليو وڃي.
- Carefully align the triangular mark on the CPU with the corresponding mark on the socket.
- Place the CPU into the socket without forcing it.
- برقرار رکڻ واري فريم کي بند ڪريو ۽ ان کي لوڊ ليور سان محفوظ ڪريو.
- Apply a thin, even layer of thermal paste to the CPU's integrated heat spreader (IHS).
- سي پي يو ڪولر کي ان جي ٺاهيندڙ جي هدايتن مطابق انسٽال ڪريو.
3.2. ميموري (RAM) جي انسٽاليشن
- Locate the four DDR3 DIMM slots. For optimal performance, refer to the motherboard's specific memory population guidelines, typically starting with slots closest to the CPU or specific colored slots for dual-channel configurations.
- DIMM سلاٽ جي ٻنهي ڇيڙن تي رکيل ڪلپس کوليو.
- DDR3 ميموري ماڊيول تي نشان کي DIMM سلاٽ ۾ چاٻي سان ترتيب ڏيو.
- Insert the memory module firmly into the slot until the retention clips snap into place.
- Ensure both clips are fully closed and the module is seated correctly.
3.3. اسٽوريج ڊيوائس جي انسٽاليشن
Connect SATA storage devices (HDDs/SSDs) to the SATA ports on the motherboard using SATA data cables. Connect the power cables from your power supply unit (PSU) to the storage devices.
3.4. ايڪسپينشن ڪارڊ جي انسٽاليشن
This motherboard features PCI Express (PCIe) slots. To install an expansion card:
- Remove the corresponding slot cover from your chassis.
- ايڪسپينشن ڪارڊ کي PCIe سلاٽ سان ترتيب ڏيو.
- Press down firmly until the card is fully seated in the slot.
- Secure the card with a screw or retention clip from your chassis.
3.5. بجلي رابطا
- 24-پن ATX پاور ڪنيڪٽر: Connect the main 24-pin power cable from your PSU to the ATX power connector on the motherboard.
- 8-pin EPS/CPU Power Connector: Connect the 8-pin (or 4+4 pin) CPU power cable from your PSU to the EPS connector near the CPU socket.
3.6. فرنٽ پينل ۽ پوئين I/O ڪنيڪشن
- فرنٽ پينل ڪنيڪٽر: Connect the power switch, reset switch, power LED, and HDD activity LED cables from your chassis to the corresponding pins on the motherboard's front panel header. Refer to the motherboard's silkscreen labels for correct orientation.
- USB هيڊر: Connect front panel USB ports to the onboard USB headers.
- آڊيو هيڊر: Connect front panel audio jacks to the onboard audio header.
- ريئر I/O پينل: Connect peripherals such as keyboard, mouse, monitor (via VGA), and network cables (to the Gigabit Ethernet ports) to the rear I/O panel.
4. آپريٽنگ هدايتون
4.1. Initial Power On and BIOS/UEFI Setup
- After all components are installed and connected, connect the power cord to the PSU and turn on the power switch on the PSU.
- پنھنجي چيسس تي پاور بٽڻ کي دٻايو.
- During the Power-On Self-Test (POST), repeatedly press the ڊي ايل or F2 key (or as indicated on screen) to enter the BIOS/UEFI setup utility.
- In the BIOS/UEFI, configure essential settings such as date and time, boot order, and enable/disable specific features as required for your operating system and hardware.
- تبديليون محفوظ ڪريو ۽ BIOS/UEFI مان نڪرو. سسٽم ٻيهر شروع ٿيندو.
4.2. آپريٽنگ سسٽم جي انسٽاليشن
To install an operating system (e.g., Windows, Linux, VMware ESXi):
- Insert the operating system installation media (USB drive or DVD) into the system.
- Boot from the installation media (you may need to adjust the boot order in BIOS/UEFI).
- Follow the on-screen prompts to install the operating system on your chosen storage device.
- After installation, install all necessary drivers for the motherboard components (chipset, LAN, VGA, etc.) from the Supermicro website or the provided driver disc.
5. سار سنڀال
باقاعده سار سنڀال توهان جي مدر بورڊ ۽ سسٽم جي ڊگهي عمر ۽ مستحڪم آپريشن کي يقيني بڻائڻ ۾ مدد ڪري ٿي.
5.1. صفائي
- وقتي طور تي مدر بورڊ ۽ سسٽم جي حصن مان مٽي کي دٻيل هوا استعمال ڪندي صاف ڪريو. صفائي کان اڳ پڪ ڪريو ته سسٽم پاور آف ۽ ان پلگ ٿيل آهي.
- مائع ڪلينر کي سڌو سنئون اجزاء تي استعمال ڪرڻ کان پاسو ڪريو.
- Ensure proper airflow within the chassis by keeping fan vents clear.
5.2. Firmware and Driver Updates
- Supermicro چيڪ ڪريو website periodically for updated BIOS/UEFI firmware and drivers for your motherboard model.
- Follow the provided instructions carefully when updating firmware to avoid system instability.
5.3. ماحولياتي خيالات
- Operate the motherboard within recommended temperature and humidity ranges to prevent damage.
- Ensure adequate ventilation in the server chassis.
6. مسئلا حل ڪرڻ
هي حصو انهن عام مسئلن جو حل فراهم ڪري ٿو جيڪي توهان کي درپيش اچي سگهن ٿا.
6.1. ڪابه پاور ناهي / ڪابه پوسٽ ناهي (پاور آن سيلف ٽيسٽ)
- Verify that the power supply unit (PSU) is connected correctly to the motherboard (24-pin ATX and 8-pin EPS connectors).
- Ensure the PSU is switched on and receiving power from the wall outlet.
- چيڪ ڪريو ته فرنٽ پينل پاور سوئچ ڪيبل صحيح طرح سان مدر بورڊ هيڊر سان ڳنڍيل آهي.
- Reseat the CPU, RAM modules, and any expansion cards.
- مسئلي کي الڳ ڪرڻ لاءِ صرف ضروري حصن (سي پي يو، هڪ ريم اسٽڪ، سي پي يو ڪولر) سان بوٽ ڪرڻ جي ڪوشش ڪريو.
- Listen for beep codes from the system speaker, which can indicate specific hardware failures. Refer to the Supermicro website for beep code interpretations.
6.2. ڊسپلي جا مسئلا
- Ensure the monitor is properly connected to the motherboard's VGA port.
- پڪ ڪريو ته مانيٽر آن آهي ۽ صحيح ان پٽ سورس تي سيٽ ڪيو ويو آهي.
- If using a discrete graphics card, ensure it is properly seated and connected to power (if required).
6.3. Operating System Not Booting
- Check the boot order in the BIOS/UEFI to ensure the correct storage device is prioritized.
- Verify that the operating system is installed correctly on the storage device.
- Ensure SATA data and power cables are securely connected to the storage device and motherboard.
7. وضاحتون
Below are the technical specifications for the Supermicro X10SLM+-LN4F motherboard:
| خاصيت | تفصيل |
|---|---|
| برانڊ | سپر مائڪرو |
| ماڊل نالو | X10SLM+-LN4F-B |
| سي پي يو ساکٽ | LGA1150 |
| چپ سيٽ جو قسم | Intel C224 |
| رام ميموري ٽيڪنالاجي | DDR3 SDRAM |
| ياداشت جي رفتار | 1600 MHz |
| ميموري رکڻ جي صلاحيت | 64 GB تائين |
| USB 2.0 بندرگاهن جو تعداد | 2 (پوئتي I/O) |
| گرافڪس ڪارڊ انٽرفيس | Integrated, PCI |
| مطابقت رکندڙ ڊوائيسز | سرور |
| پليٽ فارم | ونڊوز 10 |
| شيءِ جو وزن | 5.8 پائونڊ |
| پيداوار جي ماپ (LxWxH) | 10 x 10 x 2 انچ |
| تاريخ پهرين دستياب | 4 جون 2013 |
Note: Specifications are subject to change without notice. For the most current information, please refer to the official Supermicro product page.
8. وارنٽي ۽ سپورٽ
تفصيلي وارنٽي جي معلومات لاءِ، مھرباني ڪري پنھنجي پراڊڪٽ سان شامل وارنٽي ڪارڊ ڏسو يا سرڪاري سپر مائڪرو جو دورو ڪريو. website. Technical support is available through Supermicro's customer service channels, including their support portal, email, and phone. Please have your product model number (X10SLM+-LN4F) and serial number ready when contacting support.
For the latest drivers, BIOS updates, and additional documentation, please visit: www.supermicro.com


