1. تعارف
Thank you for choosing the Gravity 7 Band Graphic Equalizer GR-EQ9. This equalizer is designed to provide precise control over your car audio system, allowing you to fine-tune sound frequencies for an enhanced listening experience. Please read this manual thoroughly before installation and operation to ensure proper use and optimal performance.
2. حفاظت جي ڄاڻ
- ڪنهن به انسٽاليشن شروع ڪرڻ کان اڳ هميشه گاڏي جي بيٽري کي ڊسڪنيڪٽ ڪريو.
- پڪ ڪريو ته سڀئي وائرنگ صحيح طرح سان موصل ٿيل آهن ته جيئن شارٽ سرڪٽ کي روڪي سگهجي.
- Mount the equalizer securely to avoid movement during vehicle operation.
- Do not operate the unit in wet conditions or expose it to excessive moisture.
- جيڪڏهن توهان کي انسٽاليشن جي عمل جي ڪنهن به حصي بابت پڪ ناهي ته هڪ پيشيور ڪار آڊيو انسٽالر سان صلاح ڪريو.
3. پيڪيج مواد
Verify that all items are present in your GR-EQ9 package:
- Gravity 7 Band Graphic Equalizer GR-EQ9 Unit
- چڙهڻ واري بريڪٽس
- چڙهڻ اسڪرو
- پاور/گرائونڊ/ريموٽ وائرنگ هارنس
- استعمال ڪندڙ دستي
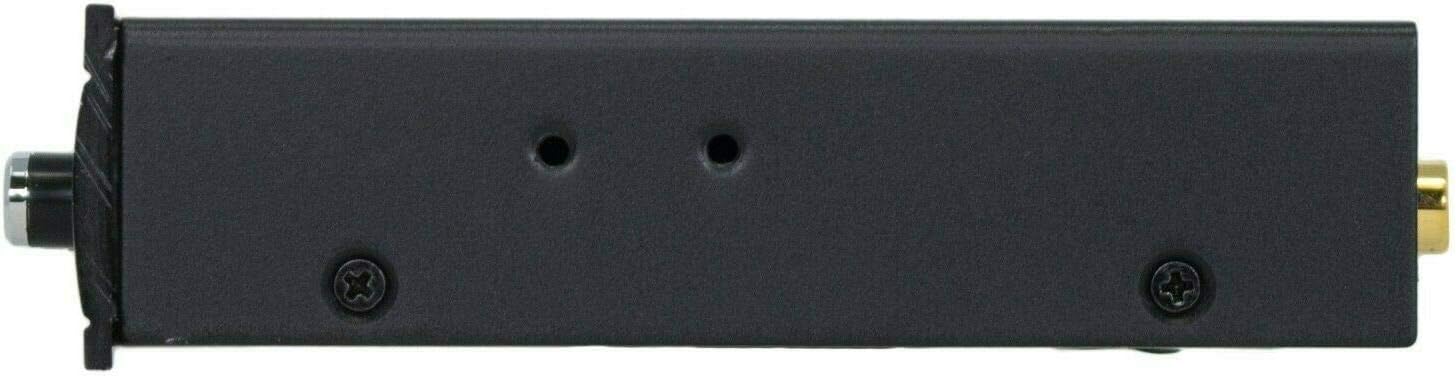
Image: Included mounting brackets, screws, and wiring harness for the GR-EQ9.
4. پراڊڪٽ ختمview
4.1. فرنٽ پينل ڪنٽرول

تصوير: مٿي view of the GR-EQ9 front panel with all controls.
- سب ليول: سب ووفر جي آئوٽ پُٽ ليول کي ترتيب ڏئي ٿو.
- حجم: سڄي سسٽم لاءِ ماسٽر واليوم ڪنٽرول.
- ذيلي تعدد: Adjusts the low-pass crossover frequency for the subwoofer output (60Hz to 90Hz).
- فادر: اڳيان ۽ پوئين اسپيڪرن جي وچ ۾ آڊيو آئوٽ پُٽ کي متوازن ڪري ٿو.
- AUX/CD Selector: Switches between Main (CD) and Auxiliary (AUX) input sources.
- 7-Band Equalizer Knobs: Individual controls for 50Hz, 125Hz, 315Hz, 750Hz, 2.2KHz, 6KHz, and 16KHz frequencies. Each band can be boosted or cut by -12dB to +12dB.
- HIGH LEVEL / MAIN LEVEL: Input level adjustment for high-level or main RCA inputs to prevent distortion.
4.2. ريئر پينل ڪنيڪشن

Image: Close-up of the GR-EQ9 rear panel connections.
- MAIN IN (L/R): RCA inputs for the primary audio source (e.g., head unit).
- AUX IN (L/R): RCA inputs for an auxiliary audio source.
- FRONT OUT (L/R): RCA outputs for front speakers.
- REAR OUT (L/R): RCA outputs for rear speakers.
- SUB OUT (L/R): RCA outputs for subwoofer amplifier. This output features a 10V line driver.
- پاور ٽرمينل (+12V، REM، GND): پاور، ريموٽ ٽرن آن، ۽ گرائونڊ لاءِ ڪنيڪشن.
5. سيٽ اپ
5.1. تنصيب
The GR-EQ9 is designed for flexible installation in various vehicle locations. Consider a location that allows for easy access to controls and proper ventilation.

Image: Mounting diagram for the GR-EQ9.
- Choose a suitable mounting location (e.g., under the dashboard, in the center console).
- Use the provided mounting brackets as a template to mark screw holes.
- Drill pilot holes and secure the brackets using the supplied screws.
- Attach the GR-EQ9 unit to the mounted brackets.
5.2. وائرنگ
Proper wiring is crucial for optimal performance and safety. Ensure all connections are secure and correctly polarized.
- پاور ڪنيڪشن (+12V): Connect the +12V wire from the equalizer to a constant +12V power source from the vehicle's battery. Use an inline fuse (not supplied) for protection. The unit operates between 9V and 16V.
- گرائونڊ ڪنيڪشن (GND): Connect the GND wire to a clean, unpainted metal surface on the vehicle chassis.
- ريموٽ ٽرن آن (REM): Connect the REM wire to the remote output of your head unit. This will turn the equalizer on and off with your car's audio system.
- آر سي اي انپٽس: Connect the RCA output from your head unit to the اندر اندر (L/R) inputs on the GR-EQ9. If using an auxiliary device, connect its RCA output to the AUX اندر (L/R) inputs.
- آر سي اي جا نتيجا: ڳنڍيو سامهون (L/R), ريئر آئوٽ (L/R), and ٻاھر موڪليو (L/R) from the GR-EQ9 to the corresponding inputs on your ampجان بچائيندڙ.
6. آپريٽنگ هدايتون
Once installed, the GR-EQ9 allows for precise audio customization.
- پاور آن: The unit will power on automatically when the remote turn-on signal is received from your head unit.
- ان پٽ چونڊ: استعمال ڪريو AUX/CD Selector button to switch between your main audio source (CD) and the auxiliary input (AUX).
- حجم ڪنٽرول: ترتيب ڏيو حجم knob to set the overall listening level.
- Subwoofer ڪنٽرول:
- استعمال ڪريو ذيلي سطح knob to control the output volume of your subwoofer.
- ترتيب ڏيو ذيلي فريڪو knob to set the low-pass crossover point for the subwoofer, typically between 60Hz and 90Hz, to blend with your main speakers.
- برابري واري ترتيب: Use the seven individual frequency knobs (50Hz, 125Hz, 315Hz, 750Hz, 2.2KHz, 6KHz, 16KHz) to boost or cut specific frequency ranges. Adjust these to tailor the sound to your preference and vehicle acoustics. Each band offers a range of -12dB to +12dB.
- فادر ڪنٽرول: جي فيڊر knob allows you to adjust the balance of sound between your front and rear speakers.
- ان پٽ ليول ايڊجسٽمينٽ: استعمال ڪريو HIGH LEVEL / MAIN LEVEL switch and corresponding knobs to match the input signal level from your head unit, preventing distortion.
7. سار سنڀال
- يونٽ کي صاف رکو ان کي نرم، سڪل ڪپڙي سان مسح ڪندي.
- سخت ڪيميائي استعمال ڪرڻ کان پاسو ڪريو يا صاف ڪندڙ صاف ڪندڙ.
- پڪ ڪريو ته سڀئي ڪنيڪشن محفوظ ۽ زنگ کان پاڪ رهن.
8. مسئلا حل ڪرڻ
| مسئلو | ممڪن سبب | حل |
|---|---|---|
| طاقت نه آهي | Blown fuse; incorrect wiring; no remote signal. | Check and replace fuse; verify +12V, GND, and REM connections. |
| آواز ڪونهي | Incorrect RCA connections; amplifier not powered; input source issue. | Verify all RCA cables are connected correctly; ensure amplifiers are on; check head unit output. |
| بگڙيل آواز | Input level too high; equalizer settings too extreme; poor grounding. | Adjust input level using HIGH LEVEL/MAIN LEVEL controls; reduce EQ boost; check ground connection. |
| Noise/Hiss | Poor grounding; RCA cables too close to power wires; gain settings too high. | Ensure proper grounding; reroute RCA cables away from power wires; adjust ampلفيئر حاصل ڪرڻ جي سيٽنگون. |
9. وضاحتون
- ماڊل: GR-EQ9
- پيداوار جي ماپ: 1.8 x 9 x 7.7 انچ
- شيء جو وزن: 1.6 پائونڊ
- برابر ڪندڙ بينڊ: 7 (50 هز، 125 هز، 315 هز، 750 هز، 2.2 ڪلو هرٽز، 6 ڪلو هرٽز، 16 ڪلو هرٽز)
- Boost/Cut: -12 dB to +12 dB per band
- Subwoofer ڪراس اوور فریکوئنسي: Adjustable (60Hz-90Hz)
- Line Driver Output: 10V (Subwoofer Output)
- بجلي جي فراهمي: 9V-16V ڊي سي
- خاص خاصيتون: EPICENTER, Fully Adjustable EQ Bands, Line Driver, RCA Output, Subwoofer Control
10. وارنٽي
This Gravity product is covered by a manufacturer's warranty against defects in materials and workmanship. Please refer to the warranty card included with your purchase or contact customer support for specific terms and conditions. Keep your proof of purchase for warranty claims.
11. سپورٽ
For technical assistance, troubleshooting, or warranty inquiries, please contact Gravity customer support. Contact details can typically be found on the product packaging or the official Gravity webسائيٽ.


