1. تعارف
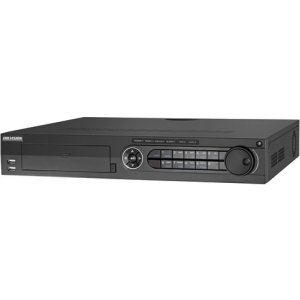
The Hikvision DS-7316HQHI-SH is a 16-channel Tribrid Digital Video Recorder (DVR) designed for advanced surveillance systems. This DVR supports Turbo HD, analog, and 1080P IP cameras, offering versatile compatibility for various security setups. It features H.264 video compression for efficient storage and supports auto-detection of camera types. This manual provides essential information for the proper installation, operation, and maintenance of your DVR system.
2. حفاظتي هدايتون
Please read these safety instructions carefully before operating the device to prevent injury or damage.
- بجلي جي فراهمي کي يقيني بڻائيtage is stable and meets the device's requirements.
- Do not place the device in direct sunlight, near heat sources, or in environments with high humidity or dust.
- Avoid placing heavy objects on top of the DVR.
- صرف Hikvision-منظور ٿيل لوازمات ۽ پاور اڊاپٽر استعمال ڪريو.
- ڪنهن به سار سنڀال يا تنصيب جي طريقيڪار کي انجام ڏيڻ کان اڳ بجلي بند ڪريو.
- Properly ground the device to prevent electrical shock.
3. پيڪيج مواد
Verify that all items are present in the package. If any items are missing or damaged, contact your supplier.
- Hikvision DS-7316HQHI-SH DVR Unit
- پاور اڊاپٽر
- USB ماؤس
- SATA ڪيبل (HDD ڪنيڪشن لاءِ)
- Screws (for HDD installation)
- تڪڙو شروع ھدايت
4. پراڊڪٽ ختمview
4.1 فرنٽ پينل

The front panel of the DVR provides access to essential controls and indicators. It typically includes:
- USB بندرگاهن: For connecting a mouse, USB flash drive, or external storage.
- حيثيت جا اشارو: LEDs for power, HDD activity, and network status.
- ڪنٽرول بٽڻ: Navigation and selection buttons for menu operation.
- IR وصول ڪندڙ: For remote control (if applicable).
4.2 ريئر پينل ڪنيڪشن
The rear panel houses all the necessary ports for connecting cameras, monitors, network, and power. Key connections include:
- ويڊيو جو انٽرويو BNC connectors for 16 Turbo HD/Analog cameras.
- وڊيو آئوٽ: HDMI and VGA ports for monitor connection.
- آڊيو ان پٽ/آئوٽ پٽ: RCA connectors for audio devices.
- LAN پورٽ: نيٽ ورڪ ڪنيڪشن لاءِ RJ45 ايٿرنيٽ پورٽ.
- USB بندرگاهن: پردي جي سامان لاءِ اضافي USB پورٽ.
- الارم I/O: Terminal blocks for alarm input and output devices.
- پاور ان پٽ: ڊي سي 12V پاور جيڪ.
5. سيٽ اپ
5.1 هارڊويئر تنصيب
- هارڊ ڊسڪ ڊرائيو (HDD) جي انسٽاليشن:
- DVR جي مٿئين ڍڪ کي کوليو ۽ هٽايو.
- SATA ڊيٽا ڪيبل ۽ پاور ڪيبل کي HDD سان ڳنڍيو.
- Align the HDD with the screw holes at the bottom of the DVR chassis and secure it with the provided screws.
- مٿيون ڍڪ تبديل ڪريو ۽ ان کي اسڪرو سان محفوظ ڪريو.
- ڪئميرا ڪنيڪشن: Connect your Turbo HD, analog, or IP cameras to the corresponding video input ports on the rear panel using BNC connectors. For IP cameras, ensure they are connected to the same network as the DVR.
- ڪنيڪشن مانيٽر: Connect a monitor to the HDMI or VGA output port on the rear panel.
- Mouse Connection: Connect the USB mouse to a USB port on the front or rear panel.
- نيٽ ورڪ ڪنيڪشن: Connect an Ethernet cable from your router/switch to the LAN port on the DVR.
- پاور ڪنيڪشن: Connect the power adapter to the DVR's power input and then plug it into a power outlet.
5.2 شروعاتي پاور آن ۽ ترتيب
After connecting all hardware, power on the DVR. The system will boot up, and you will be prompted to set up basic configurations.
- Create Admin Password: Follow the on-screen prompts to create a strong administrator password.
- Activate HDD: The newly installed HDD will need to be initialized or formatted by the DVR. Navigate to Menu > HDD > HDD Management ڊرائيو فارميٽ ڪرڻ لاء.
- نيٽ ورڪ سيٽنگون: Configure network parameters (IP address, subnet mask, gateway, DNS) to enable remote access and IP camera integration. You can use DHCP or static IP.
- تاريخ ۽ وقت: Set the correct date, time, and time zone.
- ڪئميرا جي چڪاس: The DVR will automatically detect connected Turbo HD and analog cameras. For IP cameras, you may need to add them manually via Menu > Camera > IP Camera.
6. آپريٽنگ هدايتون
6.1 يوزر انٽرفيس نيويگيشن
Use the connected USB mouse to navigate the DVR's graphical user interface (GUI). Right-click to access the main menu, and left-click to select options.
- جيئڻ View: Displays real-time video feeds from all connected cameras.
- مکيه فهرست: Provides access to all system settings, recording, playback, and advanced features.
- پلے بیک: جي اجازت ڏئي ٿو ٻيهرviewدرج ٿيل فوtage.
- بيڪ اپ: For exporting recorded video to a USB device.
6.2 رڪارڊنگ ڪنفيگريشن
To configure recording settings:
- ڏانهن وڃو Main Menu > Record > Parameters.
- Select the desired camera and configure settings such as resolution, frame rate, and bit rate.
- ڏانهن وڃو مين مينيو > رڪارڊ > شيڊول to set up continuous, motion-detection, or alarm-triggered recording schedules for each camera.
6.3 پلے بیک
To play back recorded footage:
- زنده مان view، ساڄي ڪلڪ ڪريو ۽ چونڊيو پلئه بیک، يا ڏانھن وڃو Main Menu > Playback.
- ڪئميرا ۽ تاريخ/وقت جي حد چونڊيو جيڪا توهان ٻيهر ڪرڻ چاهيو ٿاview.
- Use the timeline and control buttons (play, pause, fast forward, rewind) to navigate through the footage.
6.4 ريموٽ رسائي
To access your DVR remotely:
- Ensure the DVR is connected to the internet and network settings are correctly configured.
- Download and install the Hik-Connect app on your mobile device or the iVMS-4200 client software on your computer.
- Register an account and add your DVR using its serial number or QR code.
- Follow the app/software instructions to view لائيو فيڊ، پلے بيڪ رڪارڊنگ، ۽ سيٽنگون ريموٽ کان منظم ڪريو.
7. سار سنڀال
7.1 هارڊ ڊرائيو جو انتظام
Regularly check the status of your hard drive to ensure optimal recording performance. Go to Main Menu > HDD > HDD Management جي طرف view disk status, remaining capacity, and perform formatting if necessary. It is recommended to format the HDD periodically (e.g., every 6-12 months) to maintain performance, after backing up any critical data.
7.2 فرم ویئر تازه ڪاريون
Keep your DVR's firmware updated to benefit from new features, security enhancements, and bug fixes. Download the latest firmware from the official Hikvision website. Update the firmware via USB or network through Main Menu > Maintenance > Upgrade.
7.3 صفائي
Periodically clean the exterior of the DVR with a soft, dry cloth. Ensure ventilation openings are free from dust to prevent overheating. Do not use liquid cleaners or aerosols directly on the device.
8. مسئلا حل ڪرڻ
| مسئلو | ممڪن سبب | حل |
|---|---|---|
| مانيٽر تي ڪو به وڊيو آئوٽ پُٽ ناهي | Loose HDMI/VGA cable; Incorrect monitor input; DVR not powered on. | Check cable connections; Select correct input on monitor; Verify DVR power. |
| ڪابه ڪئميرا تصوير ناهي | Camera not powered; Loose BNC cable; Incorrect camera type selected; IP camera not configured. | Check camera power and connections; Verify camera type in DVR settings; Add/configure IP camera. |
| ڪابه رڪارڊنگ ناهي | HDD not initialized/formatted; Recording schedule not set; HDD full. | Initialize/format HDD; Configure recording schedule; Check HDD capacity. |
| DVR تائين ريموٽ رسائي نه ٿي سگهي | Network cable disconnected; Incorrect network settings; Router firewall blocking ports. | Check network cable; Verify DVR network settings (IP, DNS); Configure port forwarding on router or enable UPnP. |
9. وضاحتون
| خاصيت | تفصيل |
|---|---|
| ماڊل نمبر | DS-7316HQHI-SH-2TB |
| وڊيو انپٽس | 16 Channels (Turbo HD/Analog) + 2 IP Cameras (1080P) |
| وڊيو ڪمپريشن | ايڇ.264 |
| وڊيو آئوٽ | ايم ڊي ايم، ويگا |
| آڊيو ان پٽ/آئوٽ پٽ | ها |
| الارم I/O | ها |
| نيٽورڪ انٽرنيٽ | 1 RJ45 10M/100M/1000M ايٿرنيٽ انٽرفيس |
| USB انٽرفيس | 2 x USB 2.0 (front), 1 x USB 3.0 (rear) |
| هارڊ ڊسڪ ڊرائيو | 2TB pre-installed (supports up to 2 SATA HDDs) |
| بجلي جي فراهمي | 12V ڊي سي |
| پيداوار جي ماپ | 390 x 445 x 70 inches (Note: This dimension appears unusually large and may be a unit conversion error in the source data. Please refer to official product documentation for accurate dimensions.) |
| شيءِ جو وزن | 1 پائونڊ |
10. وارنٽي ۽ سپورٽ
Hikvision products typically come with a limited warranty. For detailed warranty information, please refer to the warranty card included with your product or visit the official Hikvision website. For technical support, product registration, or service inquiries, please contact Hikvision customer support or your authorized dealer.
سرڪاري Webسائيٽ: www.hikvision.com


