تعارف
خريد ڪرڻ لاءِ مهربانيasing the Smart Starsat SR-90000 XTREAM HD DVB-S2 Satellite Receiver. This device is designed to provide a high-quality viewing experience with its H.265 HEVC (High Efficiency Video Coding) support and Full HD 1080P output. This manual will guide you through the setup, operation, and maintenance of your new satellite receiver, ensuring optimal performance and longevity.
حفاظت جي ڄاڻ
- ڊوائيس هلائڻ کان اڳ سڀ هدايتون احتياط سان پڙهو.
- Do not expose the receiver to rain or moisture to prevent fire or electric shock.
- اوور گرم ٿيڻ کان بچڻ لاءِ يونٽ جي چوڌاري مناسب وائيٽليشن کي يقيني بڻايو وڃي.
- سي نه کوليوasing؛ سڀني خدمتن کي قابل اهلڪارن جي حوالي ڪريو.
- يونٽ سان فراهم ڪيل صرف پاور اڊاپٽر استعمال ڪريو.
- ڊوائيس کي سڌي سج جي روشني، گرمي جي ذريعن، ۽ مضبوط مقناطيسي شعبن کان پري رکو.
پيڪيج مواد
مھرباني ڪري ھيٺ ڏنل شين لاءِ دٻي کي چيڪ ڪريو:
- Smart Starsat SR-90000 XTREAM Receiver
- 2 Remote Controls (one standard, one with WiFi technology)
- وائي فائي اينٽينا
- اي ڪي ڪيبل
- پاور اڊاپٽر
- استعمال ڪندڙ جو دستياب (ھي دستاويز)
- وارنٽي ڪارڊ
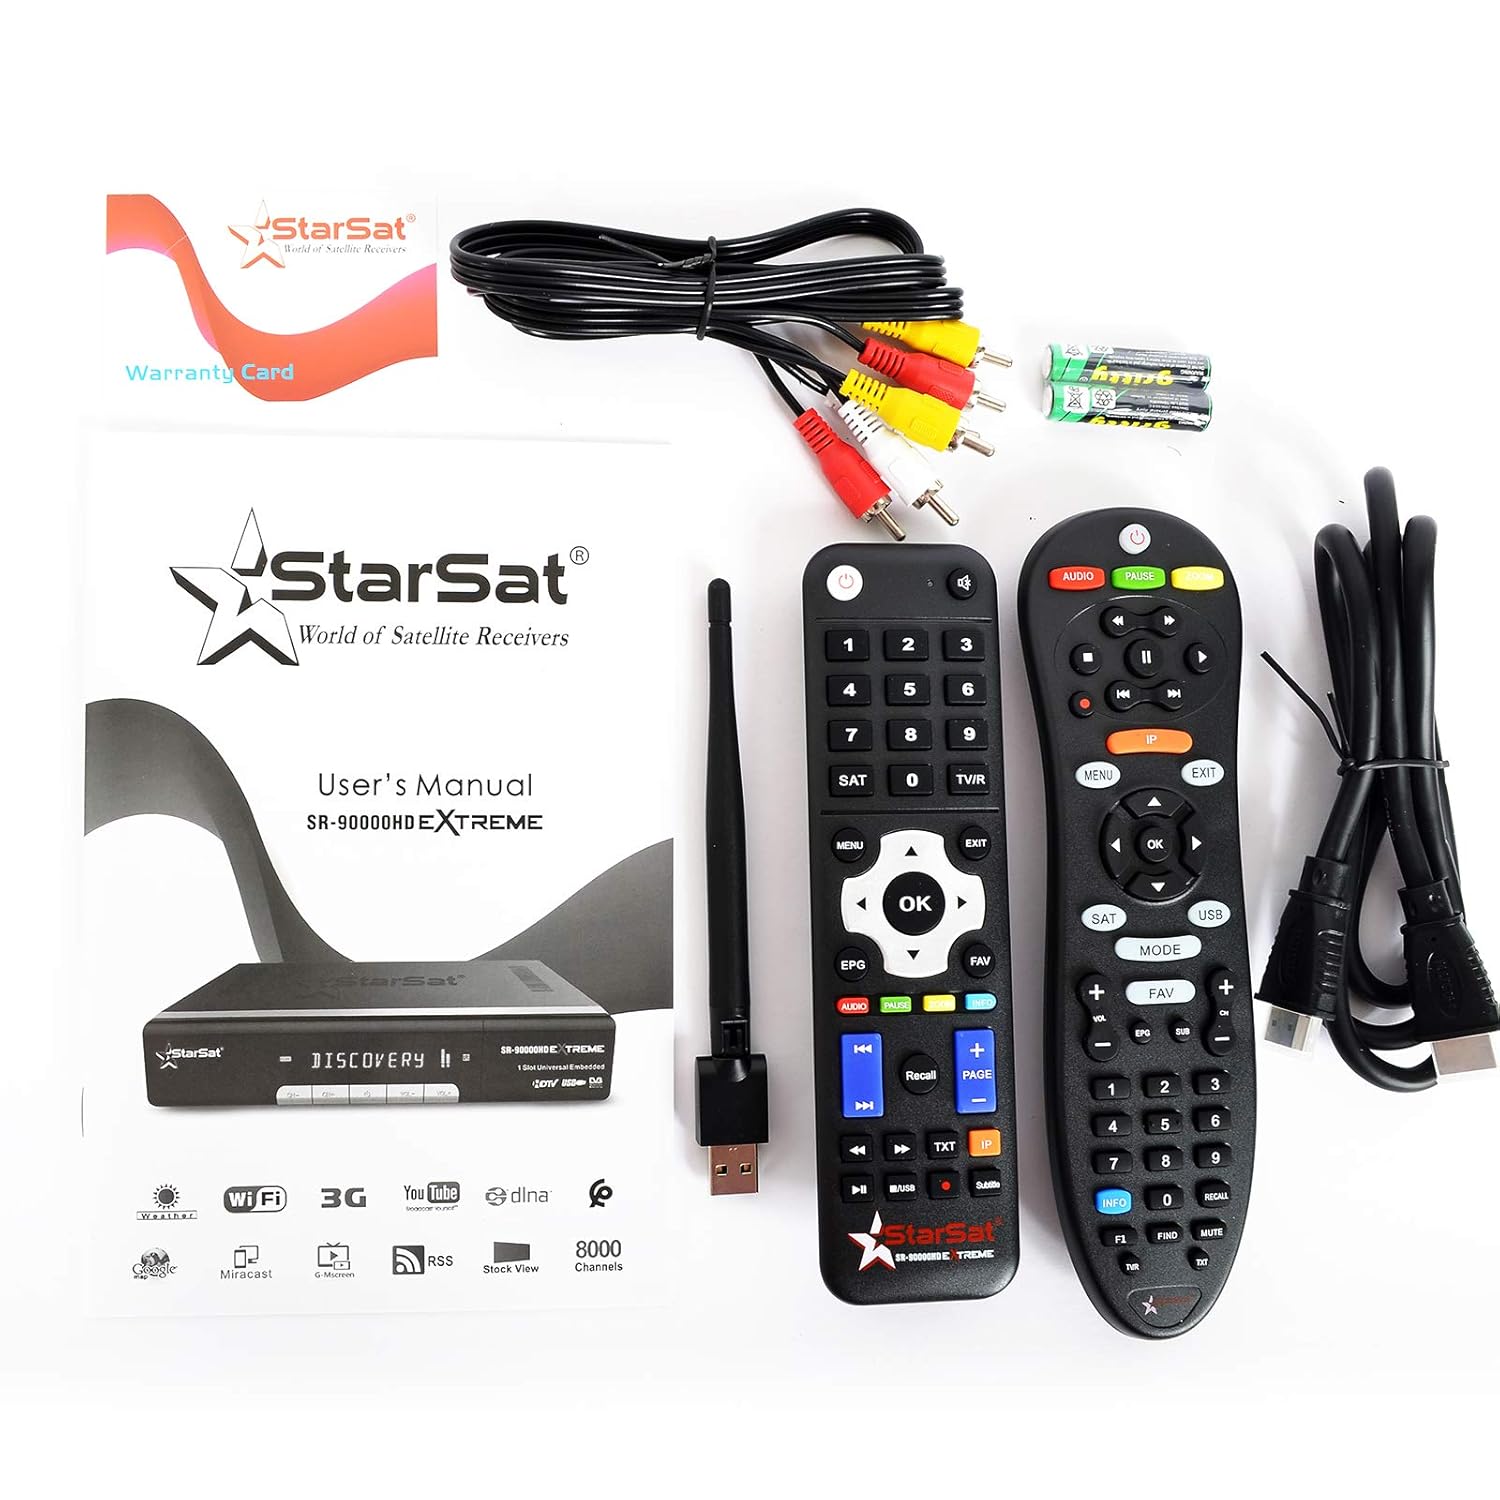
Image: All items included in the Smart Starsat SR-90000 XTREAM Receiver package.
پيداوار ختمview
سامهون پينل
The front panel of the SR-90000 XTREAM receiver features a display for channel numbers and status indicators, along with basic control buttons for power, channel up/down, and volume. A USB port is also accessible on the front for convenient media playback or software updates.
ريئر پينل ڪنيڪشن
The rear panel provides all necessary ports for connecting your receiver to a television, satellite dish, and network.

Image: Rear panel connections of the SR-90000 XTREAM Receiver.
اهم بندرگاهن:
- TUNER 1 IN / TUNER 2 IN: Connect your satellite dish cables here.
- USB 2.0: Two USB ports for external storage devices (e.g., USB drives for media playback or recording).
- DV OUT: HDMI output for connecting to your television.
- AUDIO L/R, VIDEO: RCA (AV) outputs for older televisions.
- محوري: ڊجيٽل آڊيو آئوٽ.
- آر ايس 232: سروس پورٽ.
- LAN: وائرڊ نيٽ ورڪ ڪنيڪشن لاءِ ايٿرنيٽ پورٽ.
- طاقت ۾: پاور اڊاپٽر کي ڳنڍيو.
- آن/آف سوئچ: مکيه پاور سوئچ.
سيٽ اپ ڪريو
1. توهان جي ٽيليويزن سان ڳنڍڻ
- Ensure both your TV and the receiver are powered off.
- For best quality, connect an HDMI cable from the DV OUT port on the receiver to an HDMI input on your TV.
- Alternatively, use the supplied AV cable to connect the آڊيو ايل / آر ۽ وڊيو ports on the receiver to the corresponding inputs on your TV.
2. Connecting to Your Satellite Dish
- Connect the coaxial cable(s) from your satellite dish LNB(s) to the TUNER 1 IN ۽/يا TUNER 2 IN رسيور تي بندرگاهن.
3. Connecting to the Network (Optional)
- وائرڊ ڪنيڪشن: پنهنجي روٽر کان هڪ ايٿرنيٽ ڪيبل ڳنڍيو LAN رسيور تي پورٽ.
- وائرليس ڪنيڪشن: Screw the provided WiFi antenna into the designated port on the receiver. You will configure the wireless connection in the system settings after initial power-on.
4. پاور آن ۽ شروعاتي سيٽ اپ
- Connect the power adapter to the receiver and then to a power outlet.
- ڦيرايو آن/بند switch on the rear panel to the 'ON' position.
- Turn on your TV and select the correct HDMI or AV input source.
- Follow the on-screen instructions for initial setup, which typically includes language selection, time zone, and satellite configuration/channel scan.
آپريٽنگ هدايتون
ريموٽ ڪنٽرول افعال
The receiver comes with two remote controls. The primary remote offers comprehensive control over all receiver functions. Familiarize yourself with the button layout for easy navigation.
Image: The two remote controls provided with the receiver.
- طاقت: Turns the receiver on/off or to standby.
- مينيو سيٽنگون ۽ خاصيتن لاءِ مکيه مينيو تائين رسائي حاصل ڪري ٿو.
- ٺيڪ/داخل: Confirms selections or displays channel list.
- تير بٽڻ: Navigate through menus and channels.
- نڪرڻ: Returns to the previous screen or live TV.
- VOL +/-: حجم کي ترتيب ڏئي ٿو.
- CH +/-: چينل تبديل ڪري ٿو.
- EPG: ڏيکاري ٿو اليڪٽرانڪ پروگرام گائيڊ.
- USB: Accesses media fileهڪ ڳنڍيل USB ڊوائيس مان.
- ايف وي يو: Accesses favorite channel lists.
- آڊيو: Changes audio tracks or language.
- TXT: ٽيلي ٽيڪسٽ فنڪشن.
مينيو نيويگيشن
کي دٻايو مينيو button on your remote to access the main menu. Use the arrow buttons to navigate through options such as Installation, Channel Manager, System Settings, Media Center, and Network Settings. Press OK هڪ اختيار چونڊڻ ۽ نڪرڻ واپس وڃڻ.
چينل مينيجمينٽ
In the Channel Manager menu, you can perform tasks such as:
- چينل اسڪين: ڳولھيو new satellite channels.
- تبديليون چينل: Move, delete, or lock channels.
- Favorite Groups: Create custom lists of your preferred channels.
ميڊيا پلے بیک
Insert a USB storage device into one of the USB ports. Navigate to the Media Center menu to browse and play supported media files (video, audio, images). The receiver supports DLNA for streaming content from compatible devices on your local network.
انٽرنيٽ جون خاصيتون
Connect your receiver to the internet via LAN or WiFi (configure in Network Settings) to access features like YouTube and other online services.
سار سنڀال
- صفائي: Use a soft, dry cloth to clean the exterior of the receiver. Do not use liquid cleaners or aerosols.
- وينٽيليشن: Ensure that the ventilation openings on the receiver are not blocked to prevent overheating.
- سافٽ ويئر اپڊيٽ: وقتي طور تي ٺاهيندڙ جي چيڪ ڪريو website or the receiver's system settings for available software updates to ensure optimal performance and access to new features.
مشڪلاتون
| مسئلو | ممڪن سبب | حل |
|---|---|---|
| ڪابه تصوير يا آواز | Incorrect TV input selected; loose cables; receiver not powered on. | Check TV input source; ensure all cables (HDMI/AV, power) are securely connected; power on the receiver. |
| ريموٽ ڪنٽرول ڪم نه ڪري رهيو آهي | Dead batteries; obstruction between remote and receiver; remote not pointed correctly. | Replace batteries; remove obstructions; point remote directly at the receiver's IR sensor. |
| ڪوبه سيٽلائيٽ سگنل ناهي | Dish misalignment; loose LNB cable; bad weather. | Check LNB cable connection; ensure dish is properly aligned (may require professional assistance); wait for weather to clear. |
| وائي فائي سان connectنجي نٿو سگھي | Incorrect password; WiFi antenna not connected; router issues. | Verify WiFi password; ensure WiFi antenna is securely attached; restart your router. |
وضاحتون
| خاصيت | وصف |
|---|---|
| ماڊل | SR-90000 |
| وڊيو ڊيڪوڊنگ | H.265 HEVC, Full HD 1080P |
| ٽونر جو قسم | DVB-S2 (Double Tuner) |
| USB بندرگاهن | 2 (USB 2.0) |
| رابطي | WiFi (via included antenna), LAN (Ethernet), IR |
| آڊيو آئوٽ | AC/DC, Coaxial, Audio L/R |
| وڊيو آئوٽ | HDMI (DV OUT), Video RCA |
| سپورٽ ڪيل خاصيتون | YouTube, DLNA, EPG, Multi Language, DISEQC1.0 / 1.1, PAL/NTSC |
| مطابقت رکندڙ ڊوائيسز | ٽيليويزن |
| شيءِ جو وزن | 1.46 ڪلو |
| طول و عرض (پيڪيج) | 31.3 x 29.9 x 7.7 سينٽي |
وارنٽي ۽ سپورٽ
Your Smart Starsat SR-90000 XTREAM Receiver comes with a 1-year service warranty. For technical support, further information, or to check for software updates, please visit the official Starsat webسائيٽ:

Image: Product box highlighting features and the official Starsat webحمايت لاء سائيٽ.


