1. تعارف
This manual provides detailed instructions for the installation, operation, and maintenance of the Vivotek ND9425P 16-Channel 4K UHD Network Video Recorder (NVR). This NVR is designed to manage and record video streams from up to 16 IP cameras, offering 4K UHD resolution support for high-quality surveillance. It is an integral component of a comprehensive security system, suitable for various applications requiring reliable video monitoring and recording.
Key features of the Vivotek ND9425P NVR include:
- Multimedia SoC CPU for efficient processing.
- Support for H.265, H.264, and MJPEG video codecs for flexible compression.
- Seamless recording capabilities.
- Smart Stream III optimization for bandwidth efficiency.
- Integrated PoE technology for simplified camera connectivity (when used with compatible PoE cameras).
2. حفاظت جي ڄاڻ
مھرباني ڪري ڊوائيس هلائڻ کان اڳ سڀ حفاظتي هدايتون احتياط سان پڙھو. انھن هدايتن تي عمل ڪرڻ ۾ ناڪامي جي نتيجي ۾ پيداوار کي نقصان يا نقصان ٿي سگھي ٿو.
- طاقت جو ذريعو: Use only the power adapter supplied with the NVR. Ensure the power outlet provides the correct voltage.
- وينٽيليشن: Do not block any ventilation openings. Install the NVR in a well-ventilated area to prevent overheating.
- ماحول: NVR کي پاڻي، نمي، انتهائي گرمي پد، يا سڌي سج جي روشني ۾ بي نقاب ڪرڻ کان پاسو ڪريو.
- صفائي: Disconnect power before cleaning. Use a dry, soft cloth. Do not use liquid or aerosol cleaners.
- خدمت ڪرڻ: ھن پراڊڪٽ کي پنھنجي خدمت ڪرڻ جي ڪوشش نه ڪريو. س servني خدمتن جو حوالو ڏيو قابل سروس اهلڪارن کي.
- ڪيبل: Ensure all cables are properly connected and secured to prevent tripping hazards or accidental disconnections.
3. پيڪيج مواد
انسٽاليشن سان اڳتي وڌڻ کان اڳ پڪ ڪريو ته سڀئي شيون پيڪيج ۾ موجود آهن:
- Vivotek ND9425P 16-Channel 4K UHD NVR Unit
- پاور اڊاپٽر
- USB ماؤس
- تڪڙي انسٽاليشن ھدايت
- Resource CD (containing full manual and software)
- Screws for HDD installation (if applicable)
- Ethernet ڪيبل
Note: The package contents may vary slightly depending on the specific kit purchased. For example, some kits may include 8 x 2 MP Night Vision Dome Cameras and 8 x Ethernet Patch Cables.
4. پراڊڪٽ ختمview
هي سيڪشن هڪ اوور مهيا ڪري ٿوview of the Vivotek ND9425P NVR's physical components and interfaces.
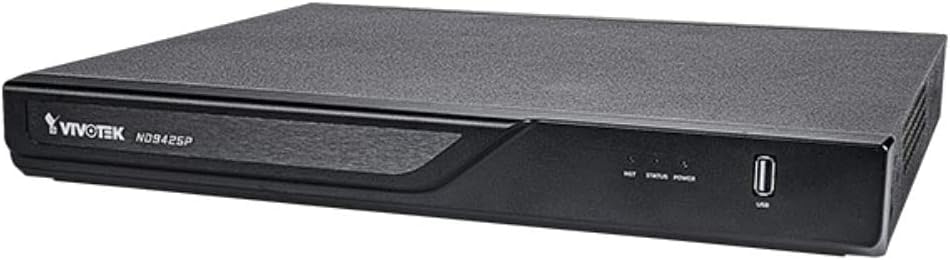
شڪل 4.1: Vivotek ND9425P NVR Front Panel
The image displays the Vivotek ND9425P NVR unit, a compact black rectangular device. The front panel features the "VIVOTEK ND9425P" logo on the left, followed by three small indicator lights labeled "NET", "STATUS", and "POWER". On the far right of the front panel, there is a USB port, labeled "USB" below it. The top surface of the NVR has a textured finish.
4.1 فرنٽ پينل اشارا ۽ بندرگاهون
- نيٽ ايل اي ڊي: ڏيکاري ٿو نيٽ ورڪ سرگرمي.
- اسٽيٽس LED: Indicates system status (e.g., recording, error).
- پاور لائيٽ: طاقت جي حالت کي ظاهر ڪري ٿو.
- USB پورٽ: For connecting a USB mouse, keyboard, or external storage devices for backup.
4.2 ريئر پينل پورٽس
The rear panel typically includes ports for power input, Ethernet (LAN), HDMI/VGA video output, audio input/output, and additional USB ports for peripheral connections.
5. سيٽ اپ
5.1 هارڊويئر تنصيب
- هارڊ ڊرائيو انسٽاليشن (جيڪڏهن اڳ ۾ نصب ٿيل نه هجي):
Unscrew the NVR cover. Carefully slide the hard drive into the bay and secure it with the provided screws. Reattach the cover.
- ڪئميرا ڳنڍيو:
Connect your IP cameras to the NVR's PoE ports (if available) or to your network switch. Ensure all cameras are powered on and accessible on the network.
- نيٽ ورڪ سان نيو:
NVR جي LAN پورٽ مان هڪ Ethernet ڪيبل کي پنهنجي روٽر يا نيٽ ورڪ سوئچ سان ڳنڍيو.
- ڊسپلي ڳنڍيو:
هڪ مانيٽر کي NVR جي HDMI يا VGA آئوٽ پُٽ پورٽ سان ڳنڍيو.
- پردي سان ڳنڍڻ:
USB مائوس کي NVR تي USB پورٽ سان ڳنڍيو.
- پاور آن:
پاور اڊاپٽر کي NVR جي پاور ان پٽ سان ڳنڍيو ۽ پوءِ ان کي پاور آئوٽليٽ ۾ لڳايو. NVR پاڻمرادو پاور آن ٿيندو.
5.2 Initial Configuration Wizard
Upon the first boot, the NVR will typically launch an initial configuration wizard. Follow the on-screen prompts to:
- ايڊمنسٽريٽر پاسورڊ سيٽ اپ ڪريو.
- نيٽ ورڪ سيٽنگون ترتيب ڏيو (DHCP يا جامد IP).
- ڳولھيو ۽ ڳنڍيل IP ڪيمرا شامل ڪريو.
- تاريخ ۽ وقت مقرر ڪريو.
- رڪارڊنگ لاءِ هارڊ ڊرائيو شروع ڪريو.
6. اين وي آر هلائڻ
6.1 زنده View
شروعاتي سيٽ اپ کان پوءِ، NVR لائيو ڏيکاريندو view ڳنڍيل ڪئميرا. توهان سنگل ڪئميرا جي وچ ۾ سوئچ ڪري سگهو ٿا view ۽ ملٽي ڪئميرا گرڊ views.
6.2 رڪارڊنگ ڪنفيگريشن
Access the recording settings through the main menu to configure recording schedules and modes:
- مسلسل رڪارڊنگ رڪارڊ 24/7.
- حرڪت جي چڪاس جي رڪارڊنگ: صرف تڏهن رڪارڊ ٿئي ٿو جڏهن ڪئميرا حرڪت ڳولي ٿو.
- مقرر ڪيل رڪارڊنگ. ڏينهن يا هفتي جي مخصوص وقتن دوران رڪارڊ.
- واقعي جي رڪارڊنگ: Records based on specific events (e.g., alarm input).
6.3 پلے بیک ۽ بيڪ اپ
Toيهر ڪرڻview رڪارڊ ٿيل footage:
- Navigate to the "Playback" section from the main menu.
- گهربل ڪئميرا ۽ تاريخ/وقت جي حد چونڊيو.
- Use the timeline to navigate through recordings.
- To back up footage, insert a USB drive into the NVR's USB port and follow the on-screen instructions for export.
6.4 ريموٽ رسائي
The Vivotek ND9425P NVR supports remote access via a web browser or dedicated mobile applications (e.g., VIVOCloud). Refer to the full user manual on the Resource CD for detailed instructions on setting up remote access, including port forwarding or P2P cloud services.
7. سار سنڀال
7.1 فرم ویئر تازه ڪاريون
Regularly check for and install firmware updates to ensure optimal performance, security, and access to new features. Firmware updates can typically be performed via the NVR's web interface or through a USB drive.
7.2 هارڊ ڊرائيو جو انتظام
The NVR will automatically overwrite the oldest recordings when the hard drive is full. You can configure storage settings, check HDD health, and format the drive through the system settings.
7.3 صفائي
Keep the NVR unit clean by gently wiping its exterior with a dry, soft cloth. Ensure ventilation openings are free from dust and obstructions.
8. مسئلا حل ڪرڻ
| مسئلو | ممڪن سبب | حل |
|---|---|---|
| ڪابه طاقت | Power cable disconnected; faulty power adapter; power outlet issue. | Check power cable connection; try a different power outlet; contact support if adapter is faulty. |
| ويڊيو جو نتيجو ناهي | HDMI/VGA cable loose; incorrect display input selected; NVR not booted. | Ensure display cable is secure; select correct input on monitor; wait for NVR to boot up. |
| ڪئميرا نه ڏيکاري رهيا آهن | Network issue; camera not powered; incorrect camera IP address; camera not added to NVR. | Check network cables; ensure cameras are powered; verify camera IP settings; add cameras via NVR interface. |
| ڪابه رڪارڊنگ | Hard drive not initialized; recording schedule not set; HDD full. | Initialize HDD in settings; configure recording schedule; check HDD status. |
| Remote Access Fails | Network configuration issue; port forwarding not set up; firewall blocking. | Verify network settings; configure port forwarding on router; check firewall rules. |
For more detailed troubleshooting, refer to the comprehensive user manual provided on the Resource CD or visit the VIVOTEK support webسائيٽ.
9. وضاحتون
| خاصيت | تفصيل |
|---|---|
| ماڊل نمبر | اين ڊي 9425 پي |
| ٺاهيندڙ | Vivotek USA |
| پيداوار جي ماپ | 19.69 x 19.69 x 11.02 انچ |
| شيءِ جو وزن | 8.62 پائونڊ |
| رابطي ٽيڪنالاجي | ايٿرنيٽ |
| مطابقت رکندڙ ڊوائيسز | ڪئميرا |
| ميموري رکڻ جي صلاحيت | 64 GB (referring to internal flash/RAM, not HDD capacity) |
| چينلن جو تعداد | 16 |
| وڊيو ڪوڊيڪس | H.265 ، H.264 ، MJPEG |
| وڌ ۾ وڌ ريزوليوشن سپورٽ | 4K UHD (as per product title) |
10. وارنٽي ۽ سپورٽ
For warranty information, please refer to the warranty card included with your product or visit the official VIVOTEK website. VIVOTEK provides technical support for its products. If you encounter issues that cannot be resolved using this manual or the troubleshooting section, please contact VIVOTEK customer support through their official webسائيٽ يا نامزد سپورٽ چينلز.
Official VIVOTEK Webسائيٽ: www.vivotek.com


