1. تعارف
The AVer A30 All-in-One Camera is a versatile device designed for various communication and presentation needs. It integrates a 4K Ultra HD camera, a high-fidelity microphone, and a speaker system into a single unit. This manual provides detailed instructions for setting up, operating, and maintaining your AVer A30 camera.
2. پراڊڪٽ ختمview
2.1 اهم خاصيتون
- 4K الٽرا ايڇ ڊي ڪئميرا: Supports high-resolution video capture and streaming.
- انٽيگريٽيڊ آڊيو سسٽم: Premium onboard microphone and speaker for clear communication, with echo cancellation and background noise reduction.
- لچڪدار ڊيزائن: Adjustable camera arm for document capture or face-to-face interaction.
- 23x ڊجيٽل زوم: Allows for detailed viewشين جي انجڻ.
- وسيع مطابقت: Works with major conferencing platforms (Zoom, Google Hangouts, Microsoft Teams, Skype, OBS, SeeSaw) and operating systems (PC, Mac, Chromebooks).
- USB/HDMI Connectivity: Simple plug-and-play setup.
- Automatic Image Rotation: Ensures correct orientation regardless of camera angle.
2.2 اجزاء
Familiarize yourself with the main components of your AVer A30 camera:
- ڪئميرا سر: Contains the 4K lens.
- ترتيب ڏيڻ وارو بازو: Allows positioning of the camera head.
- Main Unit (Base): Houses the speaker, microphone, and control buttons.
- ڪنٽرول بٽڻ: Located on the side of the main unit for various functions.
- رابطي جي بندرگاهن USB and HDMI ports on the rear of the main unit.

شڪل 2.2.1: سامهون view of the AVer A30 camera with the camera head extended upwards.
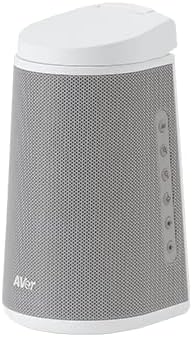
شڪل 2.2.2: پاسي view of the AVer A30 camera, highlighting the control buttons on the right side of the speaker grille.

شڪل 2.2.3: پوئتي view of the AVer A30 camera, displaying the USB and HDMI connectivity ports.
3. سيٽ اپ
3.1 Unpacking ۽ لڳائڻ
- Carefully remove the AVer A30 camera from its packaging.
- Place the camera on a stable, flat surface. Ensure there is adequate space for the adjustable arm to extend and rotate.
3.2 ڪئميرا ڳنڍڻ
The AVer A30 offers both USB and HDMI connectivity options.
3.2.1 USB Connection (for PC/Mac/Chromebook and Video Conferencing)
- Connect one end of the provided USB cable to the USB port on the rear of the AVer A30.
- USB ڪيبل جي ٻئي پڇاڙي کي توهان جي ڪمپيوٽر تي موجود USB پورٽ سان ڳنڍيو.
- The camera will be automatically detected by your operating system. No additional drivers are typically required.
- Open your preferred video conferencing software (e.g., Zoom, Microsoft Teams) or document camera application and select the AVer A30 as your camera, microphone, and speaker device.
3.2.2 HDMI Connection (for Display Output)
- Connect one end of an HDMI cable (not included) to the HDMI OUT port on the rear of the AVer A30.
- Connect the other end of the HDMI cable to an HDMI input port on your display device (monitor, projector, TV).
- The camera's output will be displayed directly on the connected screen. This mode is ideal for live presentations without a computer.
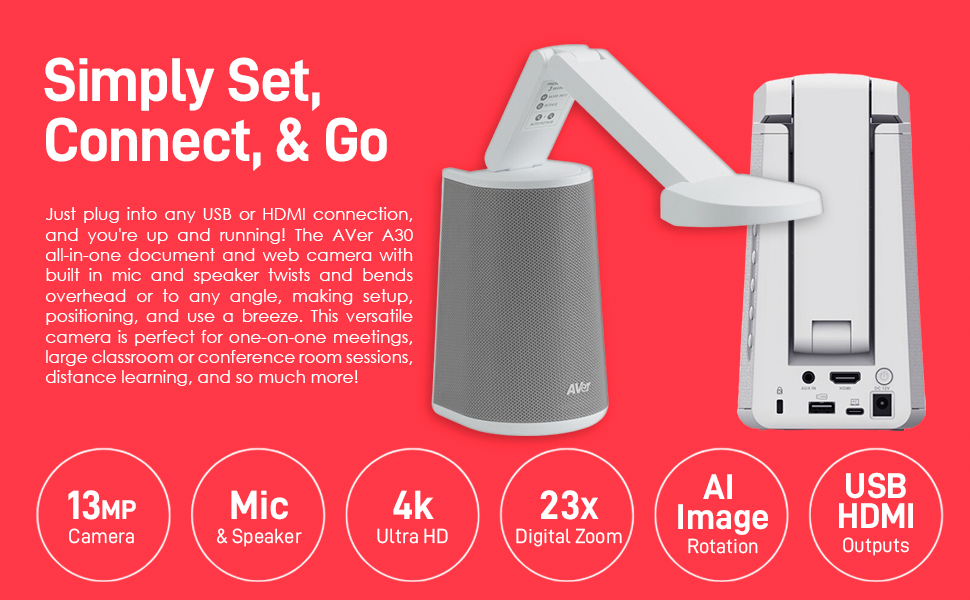
Figure 3.2.1: Illustration of connecting the AVer A30 via USB and HDMI ports to a computer and display.
4. آپريٽنگ هدايتون
4.1 Adjusting the Camera Arm
The AVer A30 features a multi-jointed arm that allows for flexible positioning of the camera head. You can twist and bend the arm to achieve various angles for different applications:
- Document Camera Mode: Position the camera head directly above a document or object on your desk.
- Webڪئميرا موڊ: Angle the camera head towards yourself for video conferencing.

Figure 4.1.1: The AVer A30 with its arm extended horizontally, suitable for capturing documents.
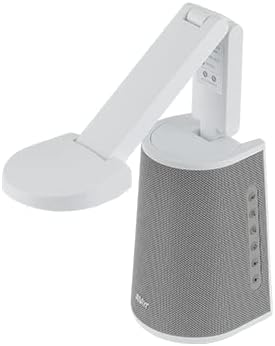
Figure 4.1.2: The AVer A30 with its arm angled, demonstrating flexibility for various uses.
4.2 Using as a Document Camera
- Position the camera arm so the camera head is directly above the document or object you wish to display.
- Ensure adequate lighting for clear image capture.
- If connected via USB, open your document camera software or video conferencing application and select the AVer A30.
- If connected via HDMI, the image will appear directly on your display.
- Use the digital zoom function (if available via software or physical controls) to magnify specific areas.
4.3 استعمال ڪندي a Webويڊيو ڪانفرنس لاء ڪئميرا
- Adjust the camera arm to point the camera head towards yourself.
- Open your video conferencing application (e.g., Zoom, Microsoft Teams).
- In the application's settings, select the AVer A30 as your primary camera, microphone, and speaker.
- The integrated microphone and speaker system will provide clear audio for your calls.

Figure 4.3.1: A user engaged in a video conference using the AVer A30 camera.

Figure 4.3.2: A user demonstrating remote work setup with the AVer A30 camera and an external monitor.
4.4 آڊيو خاصيتون
The AVer A30 features a high-fidelity microphone and speaker system:
- مائڪروفون: Designed to capture voices clearly while digitally removing echo and background noise.
- اسپيڪر: Provides clear audio output, effective up to 20 feet away.
Ensure the AVer A30 is selected as the audio input and output device in your computer's sound settings or conferencing application for optimal performance.
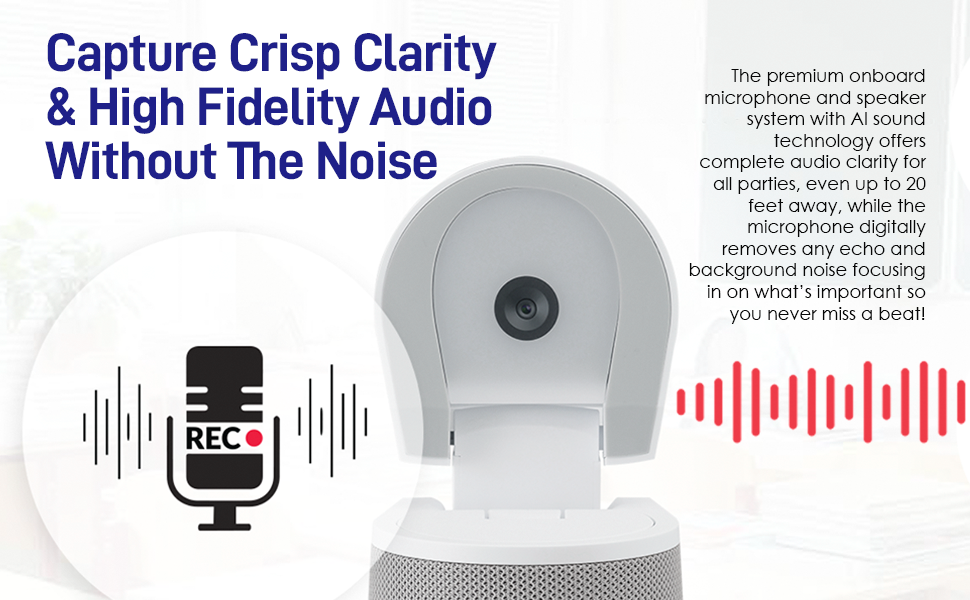
Figure 4.4.1: Visual representation of the AVer A30's microphone and speaker system for clear audio.
4.5 Automatic Image Rotation
The AVer A30 automatically adjusts the image orientation. This feature ensures that the displayed image is always right-side up, whether you are using it as a document camera or a webڪيم.
5. سار سنڀال
5.1 صفائي
- ڪئميرا لينس: Gently wipe the camera lens with a soft, lint-free cloth. For stubborn smudges, use a lens cleaning solution specifically designed for optical surfaces.
- ڊوائيس جو جسم: Use a soft, dry cloth to wipe the exterior of the camera. Avoid using harsh chemicals or abrasive cleaners.
5.2 اسٽوريج
When not in use, store the AVer A30 in a cool, dry place, away from direct sunlight and extreme temperatures. Ensure the adjustable arm is folded into a compact position to prevent damage.
6. مسئلا حل ڪرڻ
| مسئلو | ممڪن سبب | حل |
|---|---|---|
| ڪابه تصوير/وڊيو آئوٽ پُٽ ناهي |
|
|
| No audio from speaker or microphone not working |
|
|
| تصوير ڌنڌلي يا ڌيان کان ٻاهر آهي. |
|
|
| Camera not recognized by computer |
|
|
7. وضاحتون
| خاصيت | تفصيل |
|---|---|
| برانڊ | ايور |
| ماڊل نمبر | VISIONA30 |
| وڊيو ڪيپچر ريزوليوشن | 4K |
| رابطي ٽيڪنالاجي | HDMI، USB |
| خاص خصوصيت | Low Light performance |
| شيءِ جو وزن | 5 پائونڊ |
| پيڪيج جي ماپ | 12 x 11 x 11 انچ |
| Screen Size (Visible Diagonal) | 2.7 انچ / 7 سينٽي ميٽر |
8. وارنٽي ۽ سپورٽ
8.1 وارنٽي ڄاڻ
For detailed warranty information, please refer to the warranty card included with your product or visit the official AVer webسائيٽ. وارنٽي دعوائن لاءِ خريداري جو ثبوت رکو.
8.2 ٽيڪنيڪل سپورٽ
If you encounter any issues not covered in this manual or require further assistance, please contact AVer technical support. Support contact information can typically be found on the AVer webسائيٽ يا توهان جي پراڊڪٽ دستاويزن ۾.
آن لائين وسيلا: For additional resources, FAQs, and software updates, please visit the official AVer support page: AVer Support