1. تعارف
Thank you for choosing the CREATE NETBOT S40 Robot Vacuum and Mop. This manual provides essential information for the safe operation, maintenance, and troubleshooting of your device. Please read it thoroughly before first use and retain it for future reference.
2. حفاظتي هدايتون
زخم يا نقصان جي خطري کي گهٽائڻ لاءِ، هيٺ ڏنل حفاظتي احتياطن تي عمل ڪريو:
- هي اوزار 8 سالن ۽ ان کان مٿي عمر وارن ٻارن ۽ جسماني، حسي يا ذهني صلاحيتن ۾ گهٽتائي يا تجربي ۽ ڄاڻ جي کوٽ وارن ماڻهن طرفان استعمال ڪري سگهجي ٿو جيڪڏهن انهن کي اوزار جي محفوظ طريقي سان استعمال جي حوالي سان نگراني يا هدايتون ڏنيون ويون آهن ۽ ان ۾ شامل خطرن کي سمجهي سگهجي ٿو. .
- ٻارن کي اوزار سان راند نه ڪرڻ گهرجي. صفائي ۽ صارف جي سار سنڀال ٻارن جي نگراني کان سواء نه ڪئي ويندي.
- Ensure the robot is placed on a stable, level surface.
- Do not expose the robot to water or other liquids.
- وارن، ڍڪيل ڪپڙا، آڱريون ۽ جسم جي سڀني حصن کي کليل ۽ هلندڙ حصن کان پري رکو.
- Do not operate the robot in areas with open flames or explosive materials.
- Use only the original charging adapter and battery provided by the manufacturer.
- Before cleaning or maintenance, always switch off the robot and unplug it from the power source.
3. پيڪيج مواد
پڪ ڪريو ته سڀئي شيون توهان جي پيڪيج ۾ موجود آهن:
- CREATE NETBOT S40 Robot Vacuum and Mop
- چارجنگ ڊاک
- پاور اڊاپٽر
- ريموٽ ڪنٽرول
- پاسي وارا برش (2 جوڙا)
- Main Brush (pre-installed + 1 spare)
- ڪِچري جي ٽوڪريِ
- موپ پيڊ سان پاڻي جي ٽانڪي
- صفائي جو اوزار
- استعمال ڪندڙ دستي
4. پراڊڪٽ ختمview
Familiarize yourself with the components of your CREATE NETBOT S40.

تصوير 4.1: مٿي view of the CREATE NETBOT S40 robot vacuum, showing the main unit, a roller brush, a smartphone displaying the control app, and the remote control.

تصوير 4.2: هيٺيون view of the robot, illustrating the main brush, side brushes, wheels, and various sensors.
روبوٽ اجزاء
- مٿيون ڪپڙا: Houses the dust bin/water tank.
- پاور/شروع بٽڻ: Initiates or pauses cleaning.
- رابطا چارج ڪرڻ: For automatic charging at the dock.
- پاسي وارا برش: مکيه برش رستي ۾ ملبہ صاف ڪريو.
- مکيه برش: فرش تان مٽي ۽ ملبہ گڏ ڪري ٿو.
- ڪِچري جي ٽوڪريِ: Collects dry debris.
- پاڻي جي ٽانڪي: صفائي لاءِ پاڻي رکي ٿو.
- موپ پيڊ: Attaches to the water tank for wet cleaning.
- ڪلف سينسر: ڪنارن کي ڳوليو ۽ گرڻ کان روڪيو.
- بمپر: رڪاوٽون ڳولي ٿو.
- ڊرائيونگ ويلز: روبوٽ کي اڳتي وڌايو.
- عالمگير ڦيٿي: Provides steering.

Image 4.3: Close-up of the robot's top cover, showing the 'CREATE NETBOT S40' branding.
5. سيٽ اپ
5.1 چارجنگ ڊاک پليسمينٽ
Place the charging dock against a wall in an open, uncluttered area. Ensure there is at least 1 meter (3 feet) of clear space on both sides and 2 meters (6 feet) in front of the dock. Plug the power adapter into the dock and then into a wall outlet.

Image 5.1: The robot positioned next to its charging dock, illustrating proper placement.
5.2 شروعاتي چارجنگ
Place the robot onto the charging dock, ensuring the charging contacts align. The robot will emit a sound and the indicator light will illuminate, indicating it is charging. Fully charge the robot for 4-6 hours before its first use.
5.3 App Connection (Wi-Fi & Alexa)
For full functionality, download the CREATE Home app from your smartphone's app store. Follow the in-app instructions to connect your NETBOT S40 to your home Wi-Fi network. Once connected, you can link the app to Alexa for voice control.
- Download the 'CREATE Home' app.
- پنهنجي کاتي ۾ رجسٽر ٿيو يا لاگ ان ٿيو.
- Add your device by selecting 'Robot Vacuum' and following the pairing instructions.
- پڪ ڪريو ته توهان جو وائي فائي نيٽ ورڪ 2.4GHz آهي.

Image 5.2: The robot shown alongside a smartphone displaying the CREATE Home app interface, indicating successful connection and mapping capabilities.
6. آپريٽنگ هدايتون
6.1 صفائي شروع ڪرڻ/روڪائڻ
- From Robot: Press the power button on the robot's top cover.
- From Remote Control: 'شروع/روڪ' بٽڻ دٻايو.
- ايپ کان: Tap the 'Start' button in the CREATE Home app.
6.2 صفائي جا طريقا
NETBOT S40 مختلف صفائي جا طريقا پيش ڪري ٿو:
- خودڪار صفائي: روبوٽ هوشياري سان سڄي فرش واري علائقي کي نيويگيٽ ڪري ٿو ۽ صاف ڪري ٿو.
- جھ جي صفائي: صفائي کي هڪ مخصوص ننڍڙي علائقي تي مرڪوز ڪري ٿو.
- ڪنارن جي صفائي: ڀتين ۽ فرنيچر جي ڪنارن سان صفائي ڪري ٿو.
- صفائي جو بندوبست: روبوٽ لاءِ مخصوص وقت مقرر ڪريو ته جيئن ايپ ذريعي پاڻمرادو صاف ٿي سگهي.
6.3 موپنگ فنڪشن
موپنگ فنڪشن استعمال ڪرڻ لاءِ:
- پاڻي جي ٽانڪي کي صاف پاڻي سان ڀريو. ڊٽرجنٽ يا سخت ڪيميڪل استعمال نه ڪريو.
- موپ پيڊ کي پاڻي جي ٽانڪي سان محفوظ طور تي ڳنڍيو.
- ڀريل پاڻي جي ٽانڪي کي روبوٽ ۾ داخل ڪريو.
- صفائي جو چڪر شروع ڪريو. روبوٽ هڪ ئي وقت ويڪيوم ۽ موپ ڪندو.

تصوير 6.1: ويجهو تصوير view of the mop pad attached to the water tank, ready for installation into the robot.
7. سار سنڀال
باقاعده سار سنڀال بهترين ڪارڪردگي کي يقيني بڻائي ٿي ۽ توهان جي روبوٽ جي عمر وڌائي ٿي.
7.1 Dust Bin and Filter Cleaning
Empty the dust bin after each use and clean the filter regularly.
- ڊسٽ بن کي هٽائڻ لاءِ رليز بٽڻ کي دٻايو.
- Open the dust bin cover and empty its contents.
- Remove the filter and tap it gently to remove dust. Do not wash the HEPA filter with water.
- Rinse the dust bin with water if necessary, ensuring it is completely dry before reinstallation.
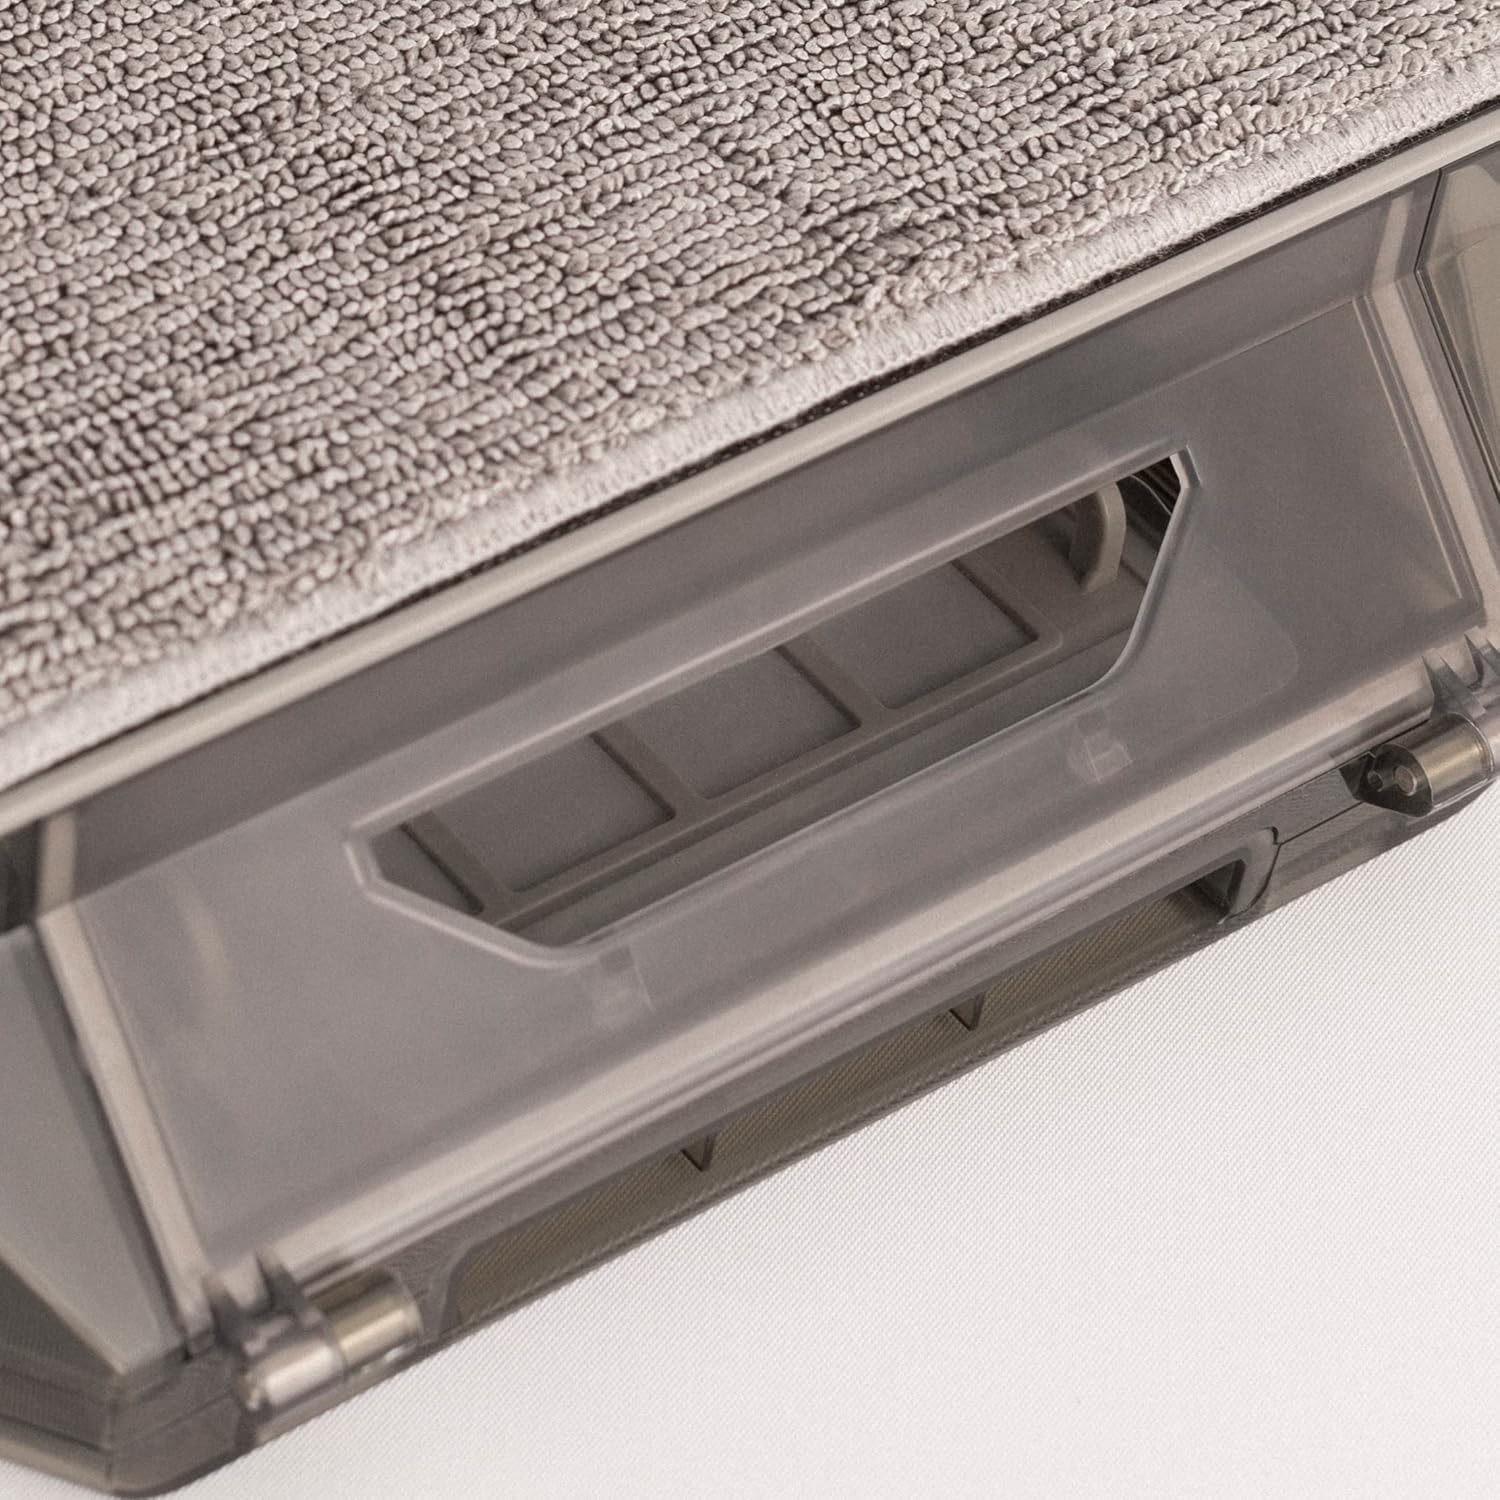
تصوير 7.1: تفصيلي view of the dust bin and its filter compartment, showing how it integrates into the robot.
7.2 Main Brush Cleaning
Clean the main brush weekly to remove tangled hair and debris.
- Turn the robot over and locate the main brush cover.
- Remove the cover and lift out the main brush.
- Use the provided cleaning tool to cut and remove tangled hair.
- مکيه برش ۽ ڪَوَر کي ٻيهر انسٽال ڪريو.
7.3 پاسي واري برش جي صفائي
Inspect side brushes regularly for wear and tear, and clean them as needed.
- پاسي واري برش کي هٽائڻ لاءِ نرميءَ سان مٿي ڇڪيو.
- Remove any hair or debris.
- If brushes are damaged, replace them with new ones.
- Press the new brushes firmly onto their posts until they click into place.
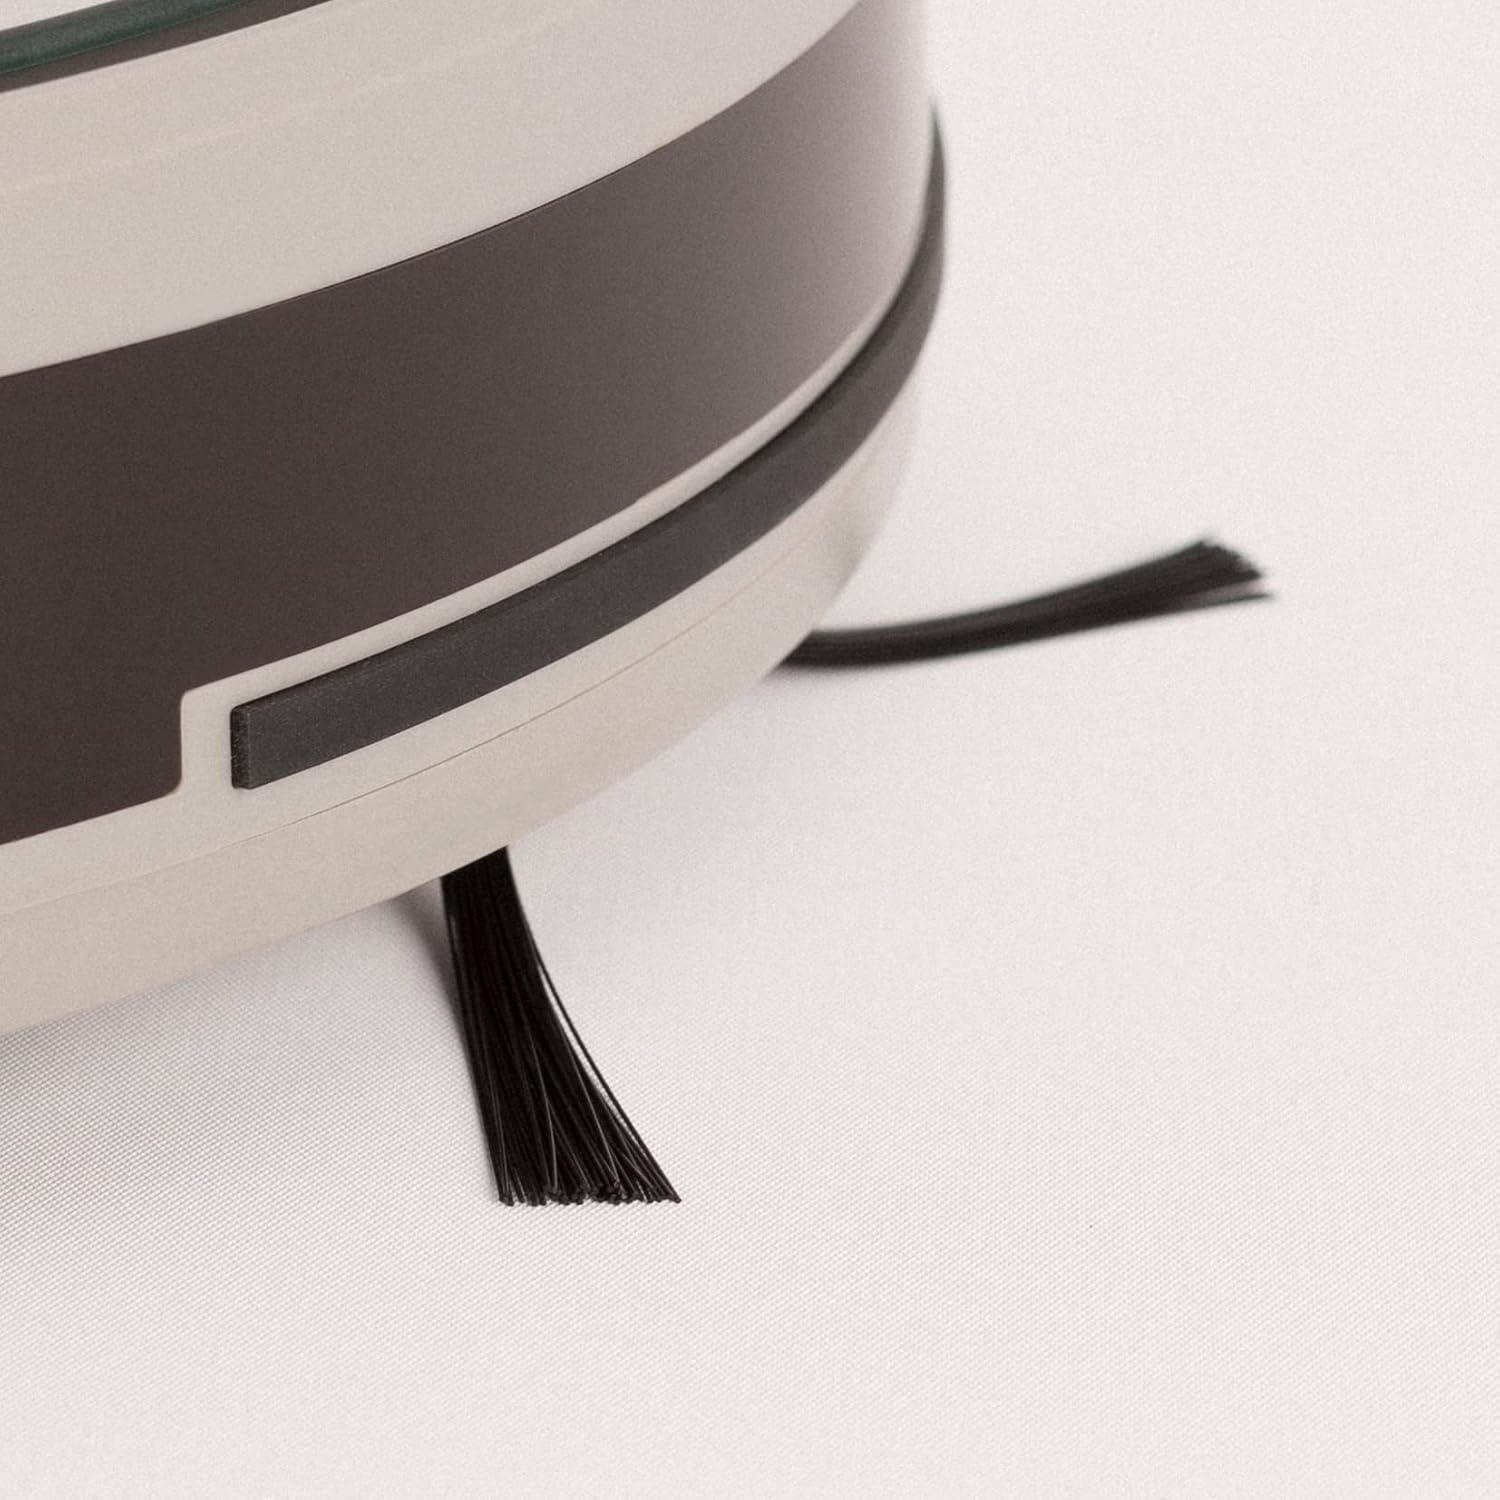
Image 7.2: Close-up of a side brush, showing its bristles and attachment point.
7.4 پاڻي جي ٽانڪي ۽ موپ پيڊ جي صفائي
هر صفائي سيشن کان پوءِ:
- ٽانڪي مان باقي پاڻي خالي ڪريو.
- Remove the mop pad and rinse it thoroughly with water. Allow it to air dry.
- اشتهار سان پاڻي جي ٽانڪي کي صاف ڪريوamp ڪپڙو.
7.5 سينسر جي صفائي
Wipe all sensors (cliff sensors, bumper sensor) with a clean, dry cloth monthly to ensure proper navigation.
8. مسئلا حل ڪرڻ
If you encounter issues with your robot, refer to the following table:
| مسئلو | ممڪن سبب | حل |
|---|---|---|
| روبوٽ نه ٿو ڦري | گهٽ بيٽري؛ پاور سوئچ بند | روبوٽ کي چارج ڪريو؛ پڪ ڪريو ته پاور سوئچ آن آهي. |
| روبوٽ چارج نٿو ڪري سگهي. | چارجنگ رابطا گندا آهن؛ ڊاک پاور نه آهي | چارجنگ رابطن کي صاف ڪريو؛ پاور اڊاپٽر ڪنيڪشن چيڪ ڪريو. |
| Cleaning performance is poor | Dust bin full; Brushes tangled; Filter clogged | Empty dust bin; Clean main/side brushes; Clean/replace filter |
| روبوٽ اڪثر ڦاسي پوندو آهي | Obstacles on floor; Cliff sensors dirty | Clear floor area; Clean cliff sensors |
| ايپ ڪنيڪشن ناڪام ٿيو | Incorrect Wi-Fi password; Router too far; 5GHz Wi-Fi | پاسورڊ جي تصديق ڪريو؛ روبوٽ کي روٽر جي ويجهو منتقل ڪريو؛ 2.4GHz وائي فائي کي يقيني بڻايو. |
جيڪڏهن مسئلو برقرار رهي، مهرباني ڪري ڪسٽمر سپورٽ سان رابطو ڪريو.
9. وضاحتون
- برانڊ: ٺاھيو
- ماڊل نالو: نيٽ بوٽ ايس 40
- ماڊل نمبر: 130436_269434
- سکشن پاور: 4000 Pa (as per product description)
- بيٽري جي زندگي: Up to 220 minutes (as per product description)
- رابطي: Wi-Fi, App Control, Alexa compatible
- طول و عرض: 64 x 40 x 12 cm (package dimensions)
- شيء جو وزن: 116 Grams (as per specifications, likely product weight is higher, but using provided data)
- بيٽري شامل آهي: ها
10. وارنٽي ۽ سپورٽ
Your CREATE NETBOT S40 comes with a standard manufacturer's warranty. Please refer to the warranty card included in your package for specific terms and conditions, including warranty period and coverage.
For technical support, troubleshooting assistance, or to inquire about replacement parts, please contact CREATE customer service through their official webسائيٽ يا توهان جي پراڊڪٽ دستاويزن ۾ ڏنل رابطي جي معلومات.


