1. تعارف
This manual provides essential instructions for setting up, operating, and maintaining your CONSUMER CELLULAR Iris Connect smartphone. The Iris Connect is designed for reliable performance, featuring a 6.5-inch display, 32GB of storage, and running on Android 13. Please read this manual thoroughly to ensure proper use and to maximize your device's capabilities.
2. دٻي ۾ ڇا آهي
Upon unboxing your CONSUMER CELLULAR Iris Connect, verify that all the following items are included:
- CONSUMER CELLULAR Iris Connect Smartphone
- USB ڪيبل
- تڪڙو شروع ھدايت
3. ڊوائيس اوورview
Familiarize yourself with the physical components of your Iris Connect smartphone.

شڪل 3.1: اڳيان ۽ پوئتي view of the Iris Connect smartphone, highlighting its sleek design and camera placement.

شڪل 3.2: سامهون view of the Iris Connect, showcasing the 6.5-inch display and front-facing camera.
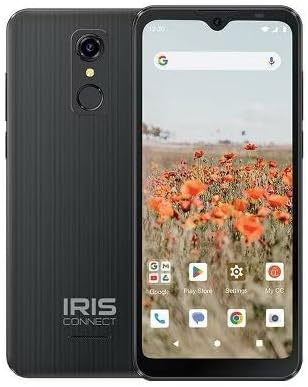
شڪل 3.3: پوئتي view of the Iris Connect, showing the main camera, flash, and fingerprint sensor.
اهم اجزاء:
- 6.5 انچ ڊسپلي: High Definition+ screen for clear visuals.
- فرنٽ ڪيمرا (8 ايم پي): سيلفي ۽ وڊيو ڪالن لاءِ ڊسپلي جي چوٽي تي واقع آهي.
- Main Camera (13MP): Located on the rear, for high-resolution photos and videos.
- فنگر پرنٽنگ اسڪينر: Integrated on the rear for secure unlocking.
- پاور بٽڻ: Typically on the right side, used to turn the device on/off or wake/sleep the screen.
- حجم بٽڻ: آڊيو ليولز کي ترتيب ڏيڻ لاءِ، پاور بٽڻ جي ڀرسان.
- USB-C پورٽ: تري ۾، چارجنگ ۽ ڊيٽا جي منتقلي لاءِ.
- 3.5mm آڊيو جيڪ: هيڊفون جوڙڻ لاءِ.
4. سيٽ اپ
4.1. سم ڪارڊ ۽ مائڪرو ايس ڊي ڪارڊ داخل ڪرڻ
- پنهنجي ڊوائيس جي پاسي تي سم ٽري ڳوليو.
- Insert the SIM ejector tool (not included, use a thin paperclip) into the small hole next to the tray and press gently until the tray pops out.
- Place your Nano-SIM card(s) into the designated slots with the gold contacts facing down.
- If desired, insert a microSD card (up to 256GB) into its dedicated slot for expanded storage.
- احتياط سان ٽري کي ڊوائيس ۾ ٻيهر داخل ڪريو جيستائين اهو جاءِ تي ڪلڪ نه ڪري.
4.2. شروعاتي پاور آن ۽ سيٽ اپ مددگار
- کي دٻايو ۽ رکو پاور بٽڻ جيستائين اسڪرين روشن ٿي وڃي.
- پنهنجي ٻولي چونڊڻ، وائي فائي نيٽ ورڪ سان ڳنڍڻ، ۽ پنهنجو گوگل اڪائونٽ سيٽ اپ ڪرڻ لاءِ اسڪرين تي ڏنل هدايتن تي عمل ڪريو.
- You may be prompted to transfer data from an old device or set up security features like the fingerprint scanner.
4.3. ڊوائيس کي چارج ڪرڻ
Before first use, it is recommended to fully charge your device. The Iris Connect features a 3500 mAh battery with an approximate charging time of 2.5 hours.
- Connect the USB cable to the USB-C port at the bottom of your phone.
- Connect the other end of the USB cable to a compatible power adapter (not included) and plug it into a wall outlet.
- چارجنگ انڊيڪيٽر اسڪرين تي ظاهر ٿيندو.
5. آپريٽنگ هدايتون
5.1. بنيادي نيويگيشن
- ڇڪڻ: ايپ کولڻ لاءِ آئڪن تي ٽيپ ڪريو يا ڪا شيءِ چونڊيو.
- سوائپ اسڪرينن جي وچ ۾ اسڪرول ڪرڻ يا نيويگيٽ ڪرڻ لاءِ پنھنجي آڱر کي اسڪرين تي گھڙيو.
- چٽيو: تصويرن کي زوم ان يا آئوٽ ڪرڻ لاءِ ٻه آڱريون استعمال ڪريو ۽ web صفحا.
- گھر جي اسڪرين: توهان جي ايپس ۽ ويجيٽس لاءِ مرڪزي مرڪز.
- ايپ ڊراور: سڀني انسٽال ٿيل ايپليڪيشنن تائين رسائي حاصل ڪرڻ لاءِ هوم اسڪرين تان مٿي سوائپ ڪريو.
5.2. ڪال ڪرڻ
- تي ٽيپ ڪريو فون توهان جي هوم اسڪرين يا ايپ ڊراور تي آئڪن.
- ڊائل پيڊ استعمال ڪندي فون نمبر داخل ڪريو يا پنهنجي ايڊريس بڪ مان هڪ رابطو چونڊيو.
- تي ٽيپ ڪريو سڏ ڪال شروع ڪرڻ لاءِ بٽڻ دٻايو.
5.3. پيغام موڪلڻ
- کوليو نياپا ايپ.
- تي ٽيپ ڪريو چيٽ شروع ڪريو or نئون پيغام آئڪن
- وصول ڪندڙ جو نمبر داخل ڪريو يا رابطن مان چونڊيو، پوءِ پنهنجو پيغام ٽائيپ ڪريو.
- تي ٽيپ ڪريو موڪليو بٽڻ
5.4. وائي فائي سان ڳنڍڻ
- ڏانهن وڃو سيٽنگون > نيٽ ورڪ ۽ انٽرنيٽ > انٽرنيٽ.
- وائي فائي کي ٽوگل ڪريو On.
- فهرست مان پنھنجو مطلوب وائي فائي نيٽ ورڪ چونڊيو ۽ جيڪڏھن چيو وڃي ته پاسورڊ داخل ڪريو.
5.5. بلوٽوٽ جوئر
- ڏانهن وڃو سيٽنگون > ڳنڍيل ڊوائيسز > ڪنيڪشن جون ترجيحون > بلوٽوٿ.
- بلوٽوت کي ٽوگل ڪريو On.
- چونڊيو نئون ڊوائيس جوڙيو and choose your desired device from the list. Follow any on-screen prompts to complete pairing.
5.6. ڪئميرا جو استعمال
The Iris Connect features a 13MP main camera and an 8MP front-facing camera.
- کوليو ڪئميرا ايپ.
- تي ٽيپ ڪريو شٽر تصوير ڪڍڻ لاءِ بٽڻ.
- Switch between photo and video modes, or front and rear cameras, using the on-screen icons.
5.7. فنگر پرنٽ اسڪينر
To set up the fingerprint scanner for secure unlocking:
- ڏانهن وڃو سيٽنگون > سيڪيورٽي ۽ رازداري > ڊوائيس انلاڪ > آڱر جو نشان.
- پنهنجي فنگر پرنٽ (ن) کي رجسٽر ڪرڻ لاءِ اسڪرين تي ڏنل هدايتن تي عمل ڪريو.
6. سار سنڀال
6.1. ڊوائيس صاف ڪرڻ
To keep your device clean and functional:
- اسڪرين ۽ جسم کي صاف ڪرڻ لاءِ نرم، لِنٽ کان پاڪ ڪپڙو استعمال ڪريو.
- سخت ڪيميڪل، رگڙيندڙ صاف ڪندڙ، يا ايروسول اسپري استعمال ڪرڻ کان پاسو ڪريو.
- پڪ ڪريو ته بندرگاهن مٽي ۽ ملبي کان پاڪ آهن.
6.2. بيٽري جي سنڀال
To optimize your battery life (up to 26 hours of use):
- انتهائي گرمي پد کان بچاء.
- ڊوائيس مڪمل ٿيڻ کان پوءِ ان کي گهڻي وقت تائين چارج ڪندي نه ڇڏيو.
- Adjust screen brightness and close unused apps to conserve power.
6.3. سافٽ ويئر اپڊيٽ
باقاعدي طور تي سافٽ ويئر اپڊيٽس جي جانچ ڪريو ته جيئن پڪ ڪري سگهجي ته توهان جي ڊوائيس ۾ جديد خاصيتون ۽ سيڪيورٽي پيچ آهن:
- ڏانهن وڃو سيٽنگون > سسٽم > سسٽم اپڊيٽ.
- ڪنهن به دستياب اپڊيٽ کي ڊائون لوڊ ۽ انسٽال ڪرڻ لاءِ اسڪرين تي ڏنل هدايتن تي عمل ڪريو.
7. مسئلا حل ڪرڻ
This section addresses common issues you might encounter with your Iris Connect smartphone.
- ڊوائيس تي طاقت نه آهي: پڪ ڪريو ته بيٽري چارج ٿيل آهي. چارجر کي ڳنڍيو ۽ ٻيهر پاور آن ڪرڻ جي ڪوشش ڪرڻ کان اڳ ڪجھ منٽ انتظار ڪريو.
- ڪوبه نيٽ ورڪ سگنل ناهي: Check if your SIM card is correctly inserted. Verify that Airplane Mode is off (swipe down from the top of the screen to check quick settings). Contact your service provider if the issue persists.
- ايپس جو ڪريش ٿيڻ يا منجمد ٿيڻ: Try restarting the app. If the issue continues, restart the phone. You may also clear the app's cache or data via سيٽنگون > ايپس > [ايپ جو نالو] > اسٽوريج ۽ ڪيش.
- سست ڪارڪردگي: Close unused apps, clear cache, or consider uninstalling rarely used applications to free up storage.
- Unable to connect to Wi-Fi/Bluetooth: Ensure Wi-Fi/Bluetooth is enabled in settings. Try forgetting the network/device and reconnecting. Restart your phone and the router/Bluetooth device.
- Forgot screen lock password/pattern: جيڪڏهن توهان وٽ گوگل اڪائونٽ ڳنڍيل آهي، ته توهان ان کي ري سيٽ ڪري سگهو ٿا. ٻي صورت ۾، فيڪٽري ري سيٽ ضروري ٿي سگهي ٿو (اهو سڀ ڊيٽا ختم ڪري ڇڏيندو).
For more complex issues, please refer to the official CONSUMER CELLULAR support resources or contact their customer service.
8. وضاحتون
Detailed technical specifications for the CONSUMER CELLULAR Iris Connect smartphone (Model: SH4650).
| خاصيت | تفصيل |
|---|---|
| ماڊل نالو | Iris Connect |
| ماڊل نمبر | SH4650 |
| آپريٽنگ سسٽم | Android 13.0 |
| ڊسپلي سائيز | 6.5 انچ |
| ڊسپلي قرارداد | 1440 x 810 |
| سي پي يو ماڊل | سنيپراگن 710 |
| سي پي يو اسپيڊ | 2 GHz |
| رام ميموري انسٽال ٿيل سائيز | 3 جي بي |
| اندروني اسٽوريج | 32 جي بي |
| وسعت وارو اسٽوريج | microSD ذريعي 256GB تائين |
| مکيه ڪئميرا | 13 ايم پي |
| سامهون ڪئميرا | 8 ايم پي |
| بيٽري جي گنجائش | 3500 مليamp ڪلاڪ |
| بيٽري پاور ريٽنگ | 3600 (likely Wh or similar unit, as mAh is 3500) |
| چارج ڪرڻ وقت | 2.5 ڪلاڪ |
| رابطي | 4G LTE, Bluetooth, Wi-Fi |
| خاص خاصيتون | Dual Camera, Expandable Storage, Fingerprint Scanner, Long Battery Life |
| آڊيو جيڪ | 3.5 ملي ميٽر |
| طول و عرض | 8 x 6 x 3 انچ |
| شيءِ جو وزن | 6.5 اونس |
9. وارنٽي ۽ سپورٽ
For information regarding your product's warranty, please refer to the warranty card included with your purchase or visit the official CONSUMER CELLULAR website. For technical assistance, troubleshooting beyond this manual, or customer service inquiries, please contact CONSUMER CELLULAR support directly.
CONSUMER CELLULAR Official Webسائيٽ: www.consumercellular.com


