تعارف
This manual provides detailed instructions for the proper use and maintenance of your DEPSTECH DS590TL-15M Endoscope Camera. Please read this manual thoroughly before operating the device to ensure safe and efficient use. This endoscope is designed for visual inspection in hard-to-reach areas such as pipes, engines, and wall cavities.
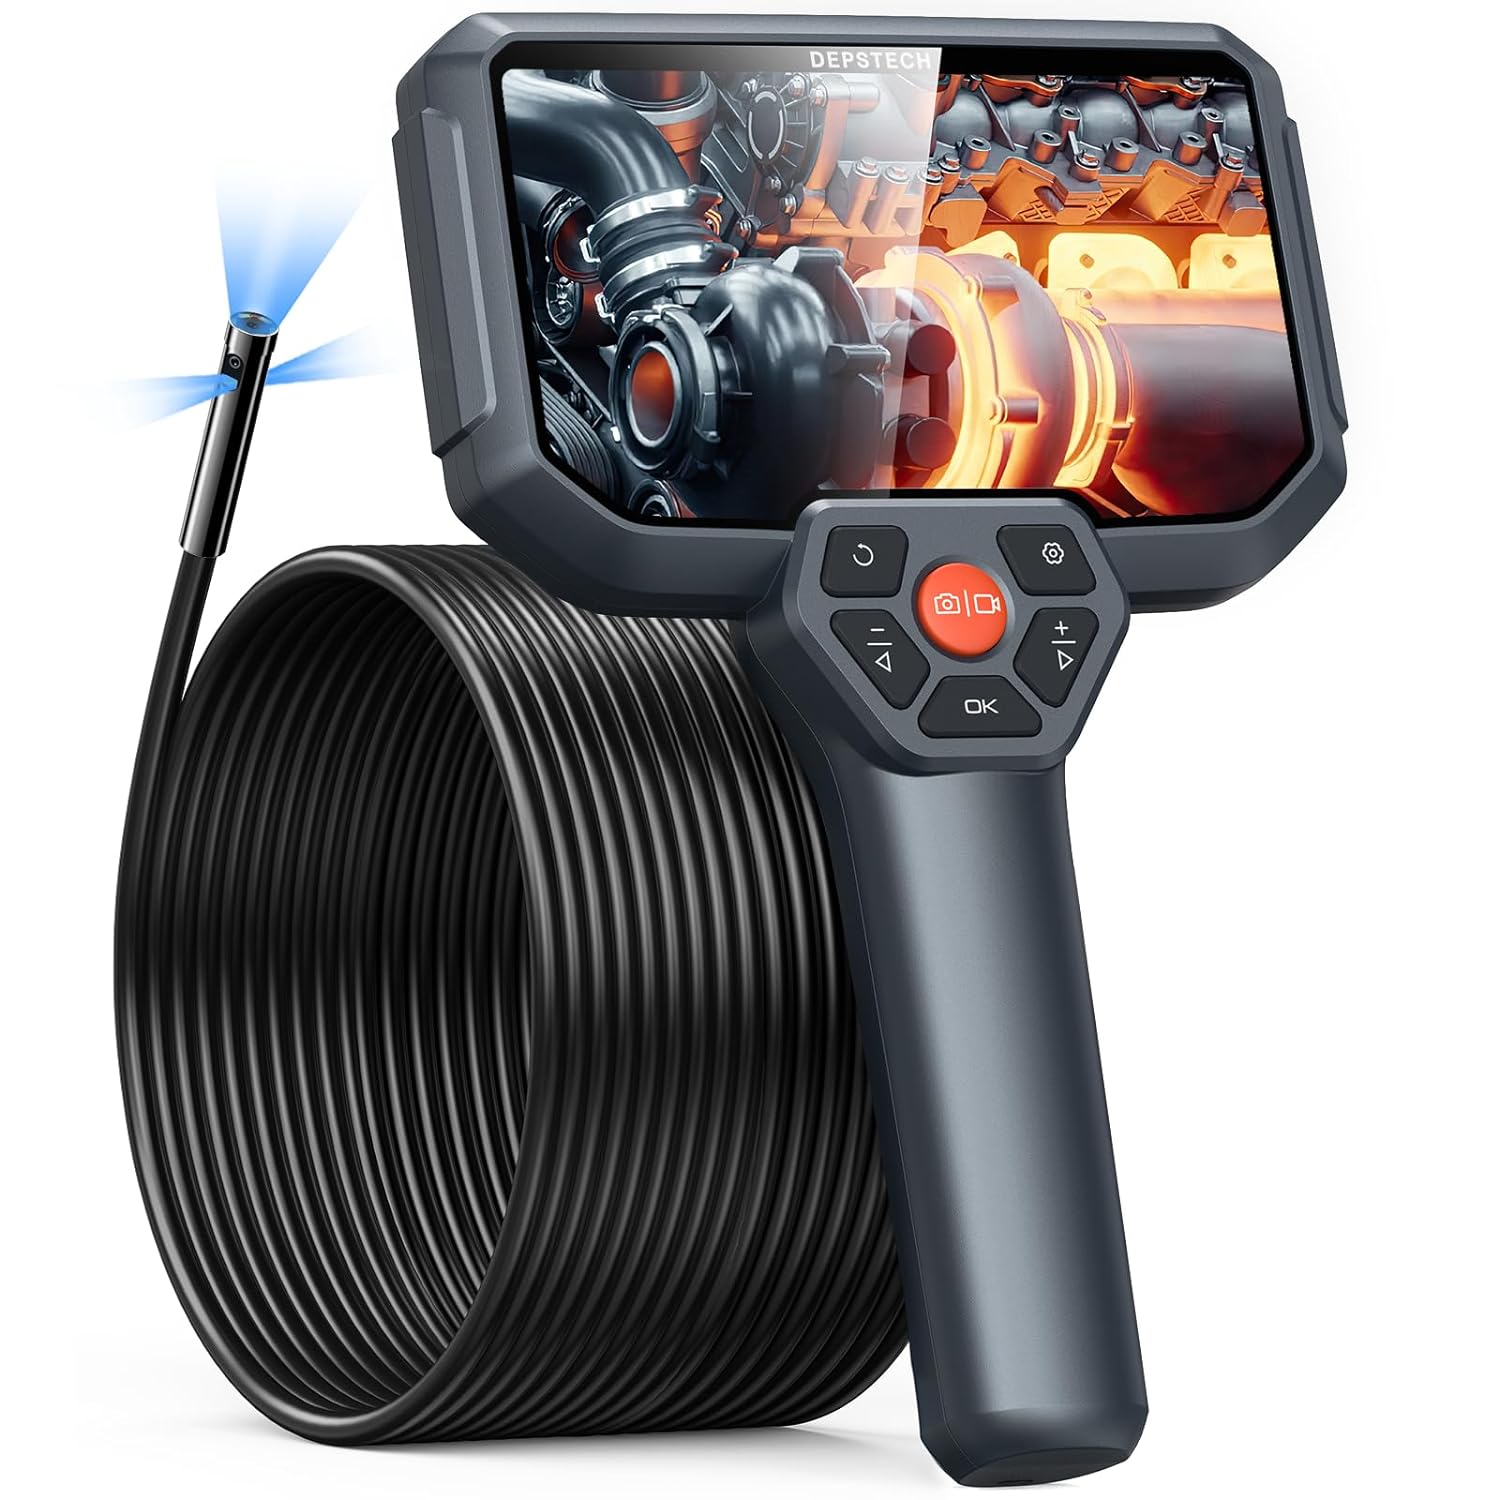
Image: The DEPSTECH DS590TL-15M Endoscope Camera, showing the handheld display unit and the long, coiled inspection cable.
حفاظت جي ڄاڻ
ڊوائيس کي زخم يا نقصان کان بچڻ لاءِ هيٺ ڏنل حفاظتي احتياطن تي عمل ڪريو:
- Do not use the device in environments with flammable or explosive gases.
- ڊوائيس کي مضبوط برقي مقناطيسي شعبن کان پري رکو.
- Ensure the camera probe is clean and dry before and after use, especially when inspecting wet environments.
- ڊوائيس کي ڌار ڪرڻ يا تبديل ڪرڻ جي ڪوشش نه ڪريو. مرمت صرف مجاز اهلڪارن پاران ڪئي وڃي.
- ڊوائيس کي ٿڌي، سڪل جاءِ تي، سڌي سج جي روشني ۽ انتهائي گرمي پد کان پري رکو.
- ٻارن جي پهچ کان پري رکو.
پيڪيج مواد
پڪ ڪريو ته سڀئي شيون پيڪيج ۾ موجود آهن:
- DS590 50FT Endoscope Unit (with integrated display and cable)
- USB قسم-سي چارجنگ ڪيبل
- استعمال ڪندڙ دستي
- Accessories (e.g., hook, magnet, side mirror - specific accessories may vary)
- کڻڻ وارو ڪيس

Image: Contents of the DEPSTECH DS590TL-15M package, including the endoscope, cable, charging cable, and accessories.
پيداوار جون خاصيتون
50FT Semi-Rigid Long Cable
The endoscope features a 50-foot (15-meter) semi-rigid cable, allowing for extended reach and navigation through complex pathways. This length is suitable for inspecting long pipes, ducts, and other deep areas.

Image: The 50-foot semi-rigid cable, highlighting its length and flexibility for various inspection tasks.
Triple Lens Camera System
Equipped with one front camera and two side cameras, this system provides multi-angle views. Users can switch between angles with a single button or view front and side perspectives simultaneously on a split screen.

Image: An exploded diagram illustrating the triple lens camera system, detailing the front and two side lenses.
High-Performance Imaging
The 2.0-megapixel CMOS sensor and Bluart Tech deliver 1080P HD resolution for clear and vivid images and videos. The camera probe is IP67 waterproof, suitable for use in wet environments.

Image: The IP67 waterproof camera head, demonstrating its capability for use in wet conditions.
5-inch IPS Display with Split-Screen View
The integrated 5-inch IPS display offers excellent clarity, color reproduction, and brightness for real-time observation. The split-screen function allows simultaneous viewing from the front and side cameras.

Image: The endoscope's display showing a split-screen view, allowing simultaneous observation from multiple camera angles.
Ergonomic Design and Battery Life
The device features an ergonomic handle for comfortable use during prolonged inspections. A built-in 2600mAh battery provides up to 4 hours of continuous working time on a full charge.

Image: An illustration of the internal 2600mAh battery, indicating its capacity and operational duration.
سيٽ اپ ڪريو
1. ڊوائيس کي چارج ڪرڻ
Before first use, fully charge the endoscope. Connect the provided USB Type-C cable to the charging port on the device and a compatible USB power adapter (not included). The charging indicator will show the charging status.
2. Connecting the Camera Cable
Align the red dots on the camera cable connector and the main unit's port. Insert the connector and twist the locking ring clockwise to secure it. Ensure a stable connection for smooth video transmission.

Image: Instructions for securely connecting the detachable camera cable to the main endoscope unit.
3. مائڪرو ايس ڊي ڪارڊ داخل ڪرڻ
Locate the Micro SD card slot on the side of the device. Insert the provided 32GB Micro SD card with the gold contacts facing down until it clicks into place. This card is used for storing images and videos.
آپريٽنگ هدايتون
1. پاور آن/آف
Press and hold the power button (usually marked with a power symbol) for a few seconds to turn the device on. Repeat the action to turn it off.
2. انٽرفيس کي نيويگيٽ ڪرڻ
Use the directional buttons (up, down, left, right) and the 'OK' button to navigate through menus and select options on the display.
3. ايل اي ڊي لائيٽس کي ترتيب ڏيڻ
The camera head is equipped with adjustable LED lights. Use the dedicated light adjustment button (often marked with a light bulb symbol or +/-) to increase or decrease illumination as needed for clear visibility in dark areas.
4. Switching Camera Views and Split Screen
Press the camera switch button (often marked with a camera icon or 'M') to cycle between the front camera, side camera, or split-screen view (displaying both simultaneously).
5. تصويرون ۽ وڊيوز ڪيپچر ڪرڻ
- فوٽو ڪڍڻ لاءِ: Press the photo button (usually a camera icon) once.
- هڪ وڊيو رڪارڊ ڪرڻ لاء: Press the video button (usually a video camera icon) once to start recording. Press it again to stop recording.
6. Using a Fish Tape for Guidance (Optional)
For navigating the cable through very tight or obstructed spaces, a fish tape (not included) can be taped to the endoscope cable to provide additional rigidity and guidance.

Image: A visual guide demonstrating the technique of attaching a fish tape to the endoscope cable for easier pipe insertion.
7. ڊيٽا جي منتقلي
To transfer captured images and videos to a computer, connect the endoscope to your computer using the provided USB Type-C cable. The device will appear as a removable storage device, allowing you to access and copy files.

Image: The endoscope connected to a computer via USB-C cable, illustrating the data transfer process.
سار سنڀال
- ڪئميرا لينس جي صفائي: After each use, especially in dirty or wet environments, gently wipe the camera lens with a soft, dry cloth. For stubborn dirt, use a lens cleaning solution.
- ڪيبل صاف ڪرڻ: Wipe the entire cable with a damp cloth to remove any debris. Ensure it is completely dry before coiling and storing.
- اسٽوريج: Store the endoscope and its accessories in the provided carrying case in a dry, cool place. Avoid extreme temperatures and direct sunlight.
- بيٽري جي سنڀال: بيٽري جي زندگي کي وڌائڻ لاءِ، بيٽري کي بار بار مڪمل طور تي چارج ڪرڻ کان پاسو ڪريو. ڊوائيس کي باقاعدي طور تي چارج ڪريو، جيتوڻيڪ ڊگهي عرصي تائين استعمال ۾ نه هجي.
مشڪلاتون
| مسئلو | ممڪن سبب | حل |
|---|---|---|
| ڊوائيس تي طاقت نه آهي. | گھٽ بيٽري؛ ڊوائيس جي خرابي. | Charge the device fully. If problem persists, contact support. |
| اسڪرين تي ڪا به تصوير ناهي. | Cable not connected properly; camera lens obstructed. | Ensure cable is securely connected. Clean the camera lens. |
| تصوير ڌنڌلي يا اونداهي آهي. | Insufficient lighting; dirty lens; focus distance issue. | Adjust LED brightness. Clean the lens. Ensure object is within macro focus range (1.18-3.93 inches). |
| تصويرون/وڊيو محفوظ نه ٿا ڪري سگهجن. | No Micro SD card; SD card full or corrupted. | Insert a Micro SD card. Delete old files or format the card (backup data first). |
وضاحتون
| خاصيت | تفصيل |
|---|---|
| ماڊل نمبر | DS590TL-15M |
| ڪيبل ڊگھائي | 50 فوٽ (تقريبن 15 ميٽر) |
| ڊسپلي سائيز | 5 انچ IPS |
| ڪئميرا قرارداد | 1080p HD |
| ڪئميرا جو قسم | Triple Lens (Front + 2 Side) |
| پنروڪ درجه بندي | IP67 (camera probe only) |
| بيٽري جي گنجائش | 2600mAh ليتيم آئن |
| ڪم ڪرڻ جو وقت | 4 ڪلاڪ تائين |
| ميڪرو فوڪس رينج | 1.18-3.93 انچ |
| ذخيرو | Micro SD card (32GB included) |
| رابطي | USB Type-C for data transfer/charging |
وارنٽي ۽ سپورٽ
DEPSTECH products are covered by a limited warranty. For specific warranty details, please refer to the warranty card included in your package or visit the official DEPSTECH website. For technical support, troubleshooting assistance, or service inquiries, please contact DEPSTECH customer service through the contact information provided in your product documentation or on the official webسائيٽ.


